VueRouterのuseRoute()とuseRouter()の違い

こんにちは!kossyです!


さて、今回はVueRouterのuseRouteとuseRouterの違いについて、
ブログに残してみたいと思います。


環境

@vue/cli 4.5.9
vue @3.0.4
npm 6.14.8
node 14.15.0


useRoute()は現在のルートを表す

useRoute()およびuseRouter()の定義元を見てみます。

/**
 * Returns the current route location. Equivalent to using `$route` inside
 * templates.
 */
export declare function useRoute(): RouteLocationNormalizedLoaded;
/**
 * Returns the router instance. Equivalent to using `$router` inside
 * templates.
 */
export declare function useRouter(): Router;

useRoute()は、

Returns the current route location.

現在のルートの場所を返します。

とのことなので、表示しているページのルートを返す関数のようですね。

RouteLocationNormalizedLoaded型を見てみます。

/**
 * {@link RouteLocationRaw} with
 */
export declare interface RouteLocationNormalizedLoaded extends _RouteLocationBase {
    /**
     * Array of {@link RouteLocationMatched} containing only plain components (any
     * lazy-loaded components have been loaded and were replaced inside of the
     * `components` object) so it can be directly used to display routes. It
     * cannot contain redirect records either
     */
    matched: RouteLocationMatched[];
}

_RouteLocationBaseをextendsしたinterfaceのようです。

_RouteLocationBaseの型定義を見ましょう。

/**
 * Base properties for a normalized route location.
 *
 * @internal
 */
export declare interface _RouteLocationBase {
    /**
     * Percentage encoded pathname section of the URL.
     */
    path: string;
    /**
     * The whole location including the `search` and `hash`. This string is
     * percentage encoded.
     */
    fullPath: string;
    /**
     * Object representation of the `search` property of the current location.
     */
    query: LocationQuery;
    /**
     * Hash of the current location. If present, starts with a `#`.
     */
    hash: string;
    /**
     * Name of the matched record
     */
    name: RouteRecordName | null | undefined;
    /**
     * Object of decoded params extracted from the `path`.
     */
    params: RouteParams;
    /**
     * Contains the location we were initially trying to access before ending up
     * on the current location.
     */
    redirectedFrom: RouteLocation | undefined;
    /**
     * Merged `meta` properties from all of the matched route records.
     */
    meta: RouteMeta;
}

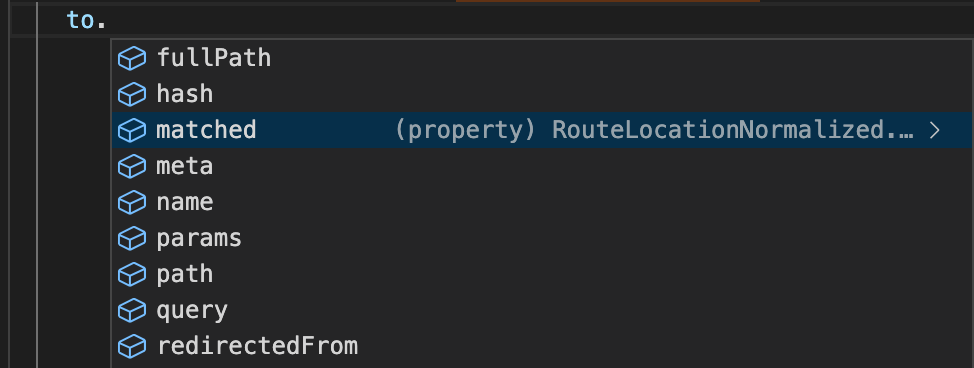
useRoute(). で表示されるコード補完候補に出てくる値は_RouteLocationBaseの値のようですね。

また、RouteLocationNormalizedLoadedにはRouteLocationMatched[]型のmatchedというプロパティが定義されています。
こちらも見にいきましょう。

export declare interface RouteLocationMatched extends RouteRecordNormalized {
    components: Record<string, RouteComponent>;
}

RouteRecordNormalizedをextendsしたinterfanceで、Record型のcomponentsというプロパティを持っていますね。

なんとな〜く型定義が理解できたので、console.logで動作確認をしてみましょう。

const route = useRoute()

onMounted(async () => {
  console.log(`matched: ${route.matched.some((record: RouteLocationMatched) => record.meta.requiresAuth)}`)
  console.log(`path: ${route.path}`)
  console.log(`fullPath: ${route.fullPath}`)
  console.log(`query: ${route.query}`)
  console.log(`hash: ${route.hash}`)
  console.log(`name: ${String(route.name)}`)
  console.log(`params: ${route.params}`)
  console.log(`redirectedFrom: ${route.redirectedFrom}`)
  console.log(`meta: ${route.meta.title}`)
}

出力例

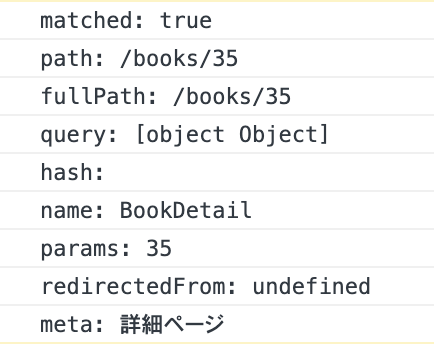
router.index.tsでルーティング定義時にmeta情報を与えているため、
route.meta.requiresAuthやtitleで値が取得できています。
redirectedFromがundefinedなのは、今回はリダイレクトではなく直接ページにアクセスしたため、
値が未定義の状態になっています。


useRouter()はVueRouterのインスタンスを返す

こちらも型定義を見に行ってみましょう。

/**
 * Router instance
 */
export declare interface Router {
    /**
     * @internal
     */
    /**
     * Current {@link RouteLocationNormalized}
     */
    readonly currentRoute: Ref<RouteLocationNormalizedLoaded>;
    /**
     * Original options object passed to create the Router
     */
    readonly options: RouterOptions;
    /**
     * Add a new {@link RouteRecordRaw | Route Record} as the child of an existing route.
     *
     * @param parentName - Parent Route Record where `route` should be appended at
     * @param route - Route Record to add
     */
    addRoute(parentName: RouteRecordName, route: RouteRecordRaw): () => void;
    /**
     * Add a new {@link RouteRecordRaw | route record} to the router.
     *
     * @param route - Route Record to add
     */
    addRoute(route: RouteRecordRaw): () => void;
    /**
     * Remove an existing route by its name.
     *
     * @param name - Name of the route to remove
     */
    removeRoute(name: RouteRecordName): void;
    /**
     * Checks if a route with a given name exists
     *
     * @param name - Name of the route to check
     */
    hasRoute(name: RouteRecordName): boolean;
    /**
     * Get a full list of all the {@link RouteRecord | route records}.
     */
    getRoutes(): RouteRecord[];
    /**
     * Returns the {@link RouteLocation | normalized version} of a
     * {@link RouteLocationRaw | route location}. Also includes an `href` property
     * that includes any existing `base`.
     *
     * @param to - Raw route location to resolve
     */
    resolve(to: RouteLocationRaw): RouteLocation & {
        href: string;
    };
    /**
     * Programmatically navigate to a new URL by pushing an entry in the history
     * stack.
     *
     * @param to - Route location to navigate to
     */
    push(to: RouteLocationRaw): Promise<NavigationFailure | void | undefined>;
    /**
     * Programmatically navigate to a new URL by replacing the current entry in
     * the history stack.
     *
     * @param to - Route location to navigate to
     */
    replace(to: RouteLocationRaw): Promise<NavigationFailure | void | undefined>;
    /**
     * Go back in history if possible by calling `history.back()`. Equivalent to
     * `router.go(-1)`.
     */
    back(): ReturnType<Router['go']>;
    /**
     * Go forward in history if possible by calling `history.forward()`.
     * Equivalent to `router.go(1)`.
     */
    forward(): ReturnType<Router['go']>;
    /**
     * Allows you to move forward or backward through the history. Calls
     * `history.go()`.
     *
     * @param delta - The position in the history to which you want to move,
     * relative to the current page
     */
    go(delta: number): void;
    /**
     * Add a navigation guard that executes before any navigation. Returns a
     * function that removes the registered guard.
     *
     * @param guard - navigation guard to add
     */
    beforeEach(guard: NavigationGuardWithThis<undefined>): () => void;
    /**
     * Add a navigation guard that executes before navigation is about to be
     * resolved. At this state all component have been fetched and other
     * navigation guards have been successful. Returns a function that removes the
     * registered guard.
     *
     * @example
     * ```js
     * router.beforeEach(to => {
     *   if (to.meta.requiresAuth && !isAuthenticated) return false
     * })
     * ```
     *
     * @param guard - navigation guard to add
     */
    beforeResolve(guard: NavigationGuardWithThis<undefined>): () => void;
    /**
     * Add a navigation hook that is executed after every navigation. Returns a
     * function that removes the registered hook.
     *
     * @example
     * ```js
     * router.afterEach((to, from, failure) => {
     *   if (isNavigationFailure(failure)) {
     *     console.log('failed navigation', failure)
     *   }
     * })
     * ```
     *
     * @param guard - navigation hook to add
     */
    afterEach(guard: NavigationHookAfter): () => void;
    /**
     * Adds an error handler that is called every time a non caught error happens
     * during navigation. This includes errors thrown synchronously and
     * asynchronously, errors returned or passed to `next` in any navigation
     * guard, and errors occurred when trying to resolve an async component that
     * is required to render a route.
     *
     * @param handler - error handler to register
     */
    onError(handler: _ErrorHandler): () => void;
    /**
     * Returns a Promise that resolves when the router has completed the initial
     * navigation, which means it has resolved all async enter hooks and async
     * components that are associated with the initial route. If the initial
     * navigation already happened, the promise resolves immediately.
     *
     * This is useful in server-side rendering to ensure consistent output on both
     * the server and the client. Note that on server side, you need to manually
     * push the initial location while on client side, the router automatically
     * picks it up from the URL.
     */
    isReady(): Promise<void>;
    /**
     * Called automatically by `app.use(router)`. Should not be called manually by
     * the user.
     *
     * @internal
     * @param app - Application that uses the router
     */
    install(app: App): void;
}

結構読み応えのある型定義だったので、今回はよく使うpushのみ説明します。。。(興味のある方は是非ご自身で動かしてみてください。)

ポピュラーな使い方としては、ページ遷移を実現したい時ですね。

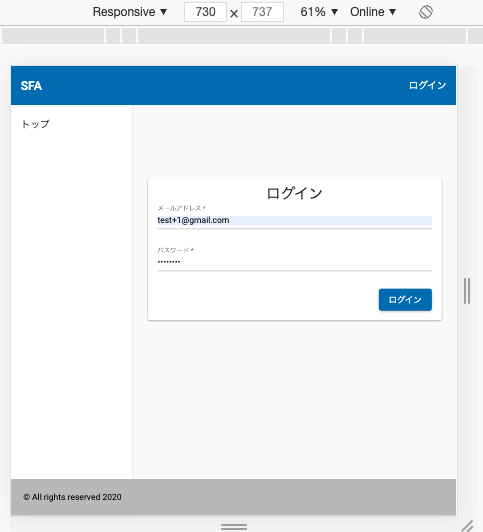
const router = useRouter()

login(formData.email, formData.password)
  .then(() => {
    router.push('/')
    })
  .catch(() => {
    alert('メールアドレスかパスワードが間違っています。')
  })

ログインに成功したら、ルート(/)のページへ遷移しています。

他にも便利な使い方がたくさんあるので、公式Guideを参考にしてみてください。
router.vuejs.org


勉強になりました。

VueRouterのナビゲーションガードのto, from, nextに型を当てる

こんにちは!kossyです!


さて、今回はVueRouterでナビゲーションガードを実装するときのto, form, nextに型を当てる方法について、
ブログに残してみたいと思います。


環境

@vue/cli 4.5.9
vue 3.0.5
node 14.15.0
npm 6.14.8


状況

以下のようなrouter/index.tsファイルがあるとします。

import { createRouter, createWebHistory, RouteRecordRaw } from 'vue-router'
import Home from '@/views/Home.vue'
import Login from '@/views/Login.vue'
import { authorizeToken } from '@/router/guards'

const routes: Array<RouteRecordRaw> = [
  {
    path: '/',
    name: 'Home',
    component: Home,
    meta: { requiresAuth: true }
  },
  {
    path: '/login',
    name: 'Login',
    component: Login,
    meta: { requiresNotAuth: true }
  }
]

const router = createRouter({
  history: createWebHistory(process.env.VUE_APP_BASE_URL),
  routes
})
router.beforeEach(authorizeToken)

export default router

authorizeToken関数の中身は以下のような感じ

// src/router/guards.ts

import { confirmationToken } from '@/api/auth'

export const authorizeToken = (to, from, next) => {
  if (to.matched.some((record) => record.meta.requiresAuth)) {
    confirmationToken()
      .then(() => {
        next()
      })
      .catch(() => {
        next({path: '/login'})
      })
  } else if (to.matched.some((record) => record.meta.requiresNotAuth)) {
      confirmationToken()
        .then(() => {
          next({ path: '/'})
        })
        .catch(() => {
          next()
        })
  }
}

authorizeTokenは、このままだと引数のto, from, nextに型推論が効かず、型安全なコードではありません。

この3つの引数に型を当ててみたいと思います。


vue-routerから型をimportして当てる

結論はタイトル通りなのですが、vue-routerのd.tsファイルを見に行ってみましょう。

// node_modules/vue-router/dist/vue-router.d.ts

/**
 * Navigation guard. See [Navigation
 * Guards](/guide/advanced/navigation-guards.md).
 */
export declare interface NavigationGuard {
    (to: RouteLocationNormalized, from: RouteLocationNormalized, next: NavigationGuardNext): NavigationGuardReturn | Promise<NavigationGuardReturn>;
}

上記を見ると、toおよびfromにはRouteLocationNormalizedを、nextはNavigationGuardNextを当てればよさそうです。

型の中身を見てみます。

/**
 * Common properties among all kind of {@link RouteRecordRaw}
 * @internal
 */
export declare interface _RouteRecordBase extends PathParserOptions {
    /**
     * Path of the record. Should start with `/` unless the record is the child of
     * another record.
     *
     * @example `/users/:id` matches `/users/1` as well as `/users/posva`.
     */
    path: string;
    /**
     * Where to redirect if the route is directly matched. The redirection happens
     * before any navigation guard and triggers a new navigation with the new
     * target location.
     */
    redirect?: RouteRecordRedirectOption;
    /**
     * Array of nested routes.
     */
    children?: RouteRecordRaw[];
    /**
     * Aliases for the record. Allows defining extra paths that will behave like a
     * copy of the record. Allows having paths shorthands like `/users/:id` and
     * `/u/:id`. All `alias` and `path` values must share the same params.
     */
    alias?: string | string[];
    /**
     * Name for the route record.
     */
    name?: RouteRecordName;
    /**
     * Before Enter guard specific to this record. Note `beforeEnter` has no
     * effect if the record has a `redirect` property.
     */
    beforeEnter?: NavigationGuardWithThis<undefined> | NavigationGuardWithThis<undefined>[];
    /**
     * Arbitrary data attached to the record.
     */
    meta?: RouteMeta;
}

上記がそれぞれの型の共通の型でした。

一通り型の仕様について理解できたので、型定義を追加しましょう。

import { confirmationToken } from '@/api/auth'
import { NavigationGuardNext, RouteLocationNormalized, RouteRecordNormalized } from 'vue-router'

export const authorizeToken = (to: RouteLocationNormalized, from: RouteLocationNormalized, next: NavigationGuardNext) => {
  if (to.matched.some((record: RouteLocationNormalized) => record.meta.requiresAuth)) {
    confirmationToken()
      .then(() => {
        next()
      })
      .catch(() => {
        next({path: '/login'})
      })
  } else if (to.matched.some((record: RouteLocationNormalized) => record.meta.requiresNotAuth)) {
      confirmationToken()
        .then(() => {
          next({ path: '/'})
        })
        .catch(() => {
          next()
        })
  }
}

これで型推論が効くようになったと思うので、マウスオーバーしてみます。

f:id:kossy-web-engineer:20210113181233p:plain

無事効いていました。


勉強になりました。


大いに参考にさせていただいたサイト

この場を借りて御礼を申し上げます。
vue-router/router.d.ts at dev · vuejs/vue-router · GitHub
ナビゲーションガード | Vue Router

npm-check-updatesを使ってサクッとライブラリをアップデートする

こんにちは!kossyです!


さて、今回はnpm-check-updatesを使ってサクッとライブラリをアップデートする方法について、
ブログに残してみたいと思います。


環境

node 12.13.1
npm 6.14.8
npm-check-updates 10.2.5


Documentを見る

何はともあれ公式Docmentを見ます。

偉大なる公式レポジトリ

npm-check-updates upgrades your package.json dependencies to the latest versions, ignoring specified versions.

npm-check-updatesは、指定されたバージョンを無視して、package.jsonの依存関係を最新バージョンにアップグレードします。

「指定されたバージョンを無視して」は頭に入れておいた方がいいですね。

以下のコマンドでinstallします。

$ npm i -g npm-check-updates

これでncuコマンドが使えるようになります。

$ ncu

以下のような出力が行われます。
f:id:kossy-web-engineer:20210110102516p:plain

それぞれの色はどんな意味があるんでしょうか。

Red = major upgrade (and all major version zero)
Cyan = minor upgrade
Green = patch upgrade

赤=メジャーアップグレード(およびすべてのメジャーバージョンゼロ)
シアン=マイナーアップグレード
緑=パッチのアップグレード

major upgradeまで行われてしまうのは辛みですね。
major upgrade以外を行うにはどうすればいいんでしょうか。

これも公式Docに答えがありました。

with --target minor, only update patch and minor:
0.1.0 → 0.2.1
with --target patch, only update patch:
0.1.0 → 0.1.2

major upgradeはapplicationへの影響度が大きいので、

$ ncu -u --target patch

を実行してみましょう。

f:id:kossy-web-engineer:20210110103941p:plain

patch upgrageが行われたことがわかりました。

minor upgradeも実行してみました。

f:id:kossy-web-engineer:20210110104202p:plain

Redのメッセージもありましたが、付番を見るとmajor upgradeではないようです。

npm install を実行するようにメッセージがあったので、実行します。


まとめ

よく脆弱性の通知で怒られてしまうので、お手軽にupgradeできるのは非常にありがたいですね。
勉強になりました。


Ansible2.9の環境構築をしてみた

こんにちは!kossyです!


さて、今回はAnsible2.9の環境構築をしてみたので、その手順をブログに残してみたいと思います。


環境

MacOS catalina
python2系
Ansible2.9


手順

まずはお手元の環境にAnsibleがinstallされているかどうかを確認

$ ansible --version
-bash: ansible: command not found

私の場合はinstallしていないので、command not foundのメッセージが表示されます。

Ansibleはpipを使ってinstallするので、pipがinstallされているかどうかを確認します。

$ pip -V
pip 18.0 from /usr/local/lib/python2.9/site-packages/pip (python 2.9)

python2系を使っている場合は以下のコマンドを実行します。
passwordの入力を求められるので、PCログイン時のパスワードを入力して下さい。

$ sudo pip install ansible\==2.9.0

ちなみにpython3系の場合は以下コマンドを実行します。

$ pip3 install ansible

しばらくするとinstallが終わるので、再度ansibleがinstallされているかどうかを確認します。

$ ansible --version
...
ansible 2.9.0
...

上記のようにinstallしたansibleのバージョンが表示されれば成功です。

AWS CLI の aws configure コマンドで設定したcredentials情報が反映されない問題

こんにちは!kossyです!


さて、今回はAWS CLIaws configure コマンドで設定したcredentials情報が反映されない問題に遭遇したので、
解決した方法をブログに残してみたいと思います。


環境
aws-cli/2.1.15
Python/3.9.1
Darwin/19.6.0


事象

以下のコマンドでcredential情報を設定した後、

aws configure

AWS Access Key ID: YOUR_ACCESS_KEY_ID
AWS Secret Access Key: YOUR_SECRET_ACCESS_KEY
Default region name: US-EAST-1
Default output format: json

aws s3 ls でコマンドで疎通確認をしようとしたところ、

$ aws s3 ls

An error occurred (InvalidAccessKeyId) when calling the ListBuckets operation: The AWS Access Key Id you provided does not exist in our records.

認証情報が違っているよ、とのこと。

きちんと設定されているか以下のコマンドで確認

$ aws configure list

      Name                    Value             Type    Location
      ----                    -----             ----    --------
   profile                <not set>             None    None
access_key     ****************ABCD             env
secret_key     ****************EFGH             env
    region                us-east-2      config-file    ~/.aws/config

Typeがshared_credentials_fileになるはずが、envになってました。。。


環境変数を読み込んでいた

以下の記事を読んだところ、.zprofile/.bash_profileの環境変数を読みに行ってることが判明。

.zprofile/.bash_profileの export aws_access_keyとaws_secret_keyを削除し、ターミナルを立ち上げ直したところ、

$ aws configure list

      Name                    Value             Type    Location
      ----                    -----             ----    --------
   profile                <not set>             None    None
access_key     ****************ABCD shared-credentials-file
secret_key     ****************EDGH shared-credentials-file
    region                us-east-2      config-file    ~/.aws/config

Typeの値が変わったことが確認できました。

再度、aws s3 ls コマンドを実行

$ aws s3 ls

2021-01-02 13:30:25 sample-app

無事疎通確認ができました。


勉強になりました。


ActionController::Parametersのマイナーなメソッドを紹介

こんにちは!kossyです!


さて、今回はActionController::Parametersのマイナーなメソッドを
ブログで紹介できればと思います。


環境
Ruby 2.6.3
Rails 6.1.0
MacOS Catalina


公式Documentはこちら

fetch

params.fetch(key, *args)のように呼び出します。

$ params
=> <ActionController::Parameters {"email"=>"test+1@gmail.com", "password"=>"test1234", "controller"=>"devise_token_auth/sessions", "action"=>"create"} permitted: false>

# 存在するkeyを指定した場合
$ params.fetch(:email)
=> "test+1@gmail.com"

# 存在しないkeyを指定した場合
$ params.fetch(:none)
=> ActionController::ParameterMissing: param is missing or the value is empty: none

# 存在しないkeyと第二引数に文字列を渡した場合
$ params.fetch(:none, 'confirm')
=> "confirm"

ユースケースとしては、以下のサイトのやりとりが参考になりました。


has_value?(value)

paramsがvalueを持っているかどうか?を返します。

$ params
=> <ActionController::Parameters {"email"=>"test+1@gmail.com", "password"=>"test1234", "controller"=>"devise_token_auth/sessions", "action"=>"create"} permitted: false>

# 存在するvalueを引数に指定した場合
$ params.has_value?("test1234")
=> true

# 存在しないvalueを指定した場合
$ params.has_value?("none")
=> false

パラメータが特定の値を持っているかどうかを検証したいときに使えるかなと思います。

permitted?

ActionController::Parametersインスタンスがpermitされているかどうかを、
true, or falseで返却します。

# permitされていない時
$ params.permitted?
=> false

# permitされている時
$ params.permit!
=> <ActionController::Parameters {"email"=>"test+1@gmail.com", "password"=>"test1234", "controller"=>"devise_token_auth/sessions", "action"=>"create"} permitted: true>

$ params.permitted?
=> true


勉強になりました。

Terraform環境構築時の「Version could not be resolved」エラーの解消方法

こんにちは!kossyです!


さて、今回はTerraform環境構築時にハマったエラーの解消方法について、
ブログに残してみたいと思います。


環境
Homebrew 2.6.2
tfenv 2.0.0
terraform 0.12.28


tfenvのインストール

まずはTerraformのバージョン管理ツールであるtfenvをHomebrew経由でインストールしました。

偉大なる本家リポジトリはこちら


$ brew install tfenv

# 成功すると以下のメッセージが表示される
🍺  /usr/local/Cellar/tfenv/2.0.0: 22 files, 74.6KB, built in 8 seconds

次に、tfenvを使ってTerraformの0.12.28をダウンロードしました。

$ tfenv install 0.12.28

Installing Terraform v0.12.28
Downloading release tarball from https://releases.hashicorp.com/terraform/0.12.28/terraform_0.12.28_darwin_amd64.zip
################################################################################################################################ 100.0%
Downloading SHA hash file from https://releases.hashicorp.com/terraform/0.12.28/terraform_0.12.28_SHA256SUMS
No keybase install found, skipping OpenPGP signature verification
Archive:  tfenv_download.Ceb0NC/terraform_0.12.28_darwin_amd64.zip
  inflating: /usr/local/Cellar/tfenv/2.0.0/versions/0.12.28/terraform
Installation of terraform v0.12.28 successful. To make this your default version, run 'tfenv use 0.12.28'

terraform --versionコマンドが動かない

後から考えれば、「To make this your default version, run 'tfenv use 0.12.28'」って書いてあったんですが、、、
参考にした記事の通り脳死でコマンドを実行していました、、、

$ terraform --version

cat: /usr/local/Cellar/tfenv/2.0.0/version: No such file or directory
Version could not be resolved (set by /usr/local/Cellar/tfenv/2.0.0/version or tfenv use <version>)

tfenv listコマンドも動かない

$ tfenv list

cat: /usr/local/Cellar/tfenv/2.0.0/version: No such file or directory
Version could not be resolved (set by /usr/local/Cellar/tfenv/2.0.0/version or tfenv use <version>)
tfenv-version-name failed

ググって見つけた記事で「tfenv use」コマンドを実行する必要があることに気がつく

$ tfenv use 0.12.28

# 成功すると以下のメッセージが出る
Switching default version to v0.12.28
Switching completed


$ tfenv list

* 0.12.28 (set by /usr/local/Cellar/tfenv/2.0.0/version)

動くようになった。

一部記事ではtfenv use を実行しないものもありますが、初めてTerraform環境を構築する際には、
まずはtfenv use コマンドを実行する必要があるようですね。勉強になりました。

何も考えずにコマンドを実行するのはやめて、しっかりCLIのメッセージを見るようにしましょう。


参考にさせていただいた記事

この場を借りて御礼を申し上げます。
tfenv listで "Version could not be resolved" が発生する - Qiita

Railsで様々なrequest.user_agentを取得したい

こんにちは!kossyです!


さて、今回はRailsで開発中にMacOS以外の様々なユーザーエージェントを試す方法について、
ブログに残してみたいと思います。


環境
Ruby 2.6.3
Rails 6.0.3.4
MacOS Catalina
Chrome 87


検証ツールを使う

chromeの検証ツールは、右クリック => 検証を選択することで開くことができます。

検証ツールを開くと以下のような画面になるかと思います。
f:id:kossy-web-engineer:20201231203522p:plain

ここで、左上のタブレットのマークをクリックすると、画面の大きさが切り替わります。

f:id:kossy-web-engineer:20201231203620p:plain

デフォルトではresponsiveが選択された状態だと思いますが、クリックすると、様々なクライアントの環境を選択することができます。
この機能ですが、画面の大きさが変わるだけでなく、user_agentも変わります。

例えば、Galaxy S5を選択した状態でリクエストをして、デバッグしてみます。

$ request.user_agent
=> "Mozilla/5.0 (Linux; Android 5.0; SM-G900P Build/LRX21T) AppleWebKit/537.36 (KHTML, like Gecko) Chrome/87.0.4280.88 Mobile Safari/537.36"
||

Android 5.0からのリクエストとして処理されています。

他のクライアントも試してみましょう。

>|ruby|
# Pixel 2の場合
$ request.user_agent
=> "Mozilla/5.0 (Linux; Android 8.0; Pixel 2 Build/OPD3.170816.012) AppleWebKit/537.36 (KHTML, like Gecko) Chrome/87.0.4280.88 Mobile Safari/537.36"

# iPhone5/SEの場合
$ request.user_agent
=> "Mozilla/5.0 (iPhone; CPU iPhone OS 10_3_1 like Mac OS X) AppleWebKit/603.1.30 (KHTML, like Gecko) Version/10.0 Mobile/14E304 Safari/602.1"

# iPhone Xの場合
$ request.user_agent
=> "Mozilla/5.0 (iPhone; CPU iPhone OS 13_2_3 like Mac OS X) AppleWebKit/605.1.15 (KHTML, like Gecko) Version/13.0.3 Mobile/15E148 Safari/604.1"

# iPadの場合
$ request.user_agent
=> "Mozilla/5.0 (iPad; CPU OS 11_0 like Mac OS X) AppleWebKit/604.1.34 (KHTML, like Gecko) Version/11.0 Mobile/15A5341f Safari/604.1"

# Surface Duoの場合
$ request.user_agent
=> "Mozilla/5.0 (Linux; Android 8.0; Pixel 2 Build/OPD3.170816.012) AppleWebKit/537.36 (KHTML, like Gecko) Chrome/87.0.4280.88 Mobile Safari/537.36"

選択したクライアントごとに、user_agentの返り値が変わっていることが確認できました。

user_agentごとに処理を変えるような機能がある場合に役に立ちそうですね。


勉強になりました。

devise_token_authのset_user_by_tokenのソースコードを追ってみた

こんにちは!kossyです!


さて、今回はdevise_token_authのset_user_by_tokenメソッドのコードリーディングをしてみたので、
ブログに残してみたいと思います。


偉大なる本家リポジトリはこちら


なお、前提としてSupervisorというdeviseを利用したモデルが定義されていることとします。


devise_token_authのset_user_by_tokenメソッドはとても長い

以下、コード全部載せます。

  # user auth
  def set_user_by_token(mapping = nil)
    # determine target authentication class
    rc = resource_class(mapping)

    # no default user defined
    return unless rc

    # gets the headers names, which was set in the initialize file
    uid_name = DeviseTokenAuth.headers_names[:'uid']
    access_token_name = DeviseTokenAuth.headers_names[:'access-token']
    client_name = DeviseTokenAuth.headers_names[:'client']

    # parse header for values necessary for authentication
    uid              = request.headers[uid_name] || params[uid_name]
    @token           = DeviseTokenAuth::TokenFactory.new unless @token
    @token.token     ||= request.headers[access_token_name] || params[access_token_name]
    @token.client ||= request.headers[client_name] || params[client_name]

    # client isn't required, set to 'default' if absent
    @token.client ||= 'default'

    # check for an existing user, authenticated via warden/devise, if enabled
    if DeviseTokenAuth.enable_standard_devise_support
      devise_warden_user = warden.user(mapping)
      if devise_warden_user && devise_warden_user.tokens[@token.client].nil?
        @used_auth_by_token = false
        @resource = devise_warden_user
        # REVIEW: The following line _should_ be safe to remove;
        #  the generated token does not get used anywhere.
        # @resource.create_new_auth_token
      end
    end

    # user has already been found and authenticated
    return @resource if @resource && @resource.is_a?(rc)

    # ensure we clear the client
    unless @token.present?
      @token.client = nil
      return
    end

    # mitigate timing attacks by finding by uid instead of auth token
    user = uid && rc.dta_find_by(uid: uid)
    scope = rc.to_s.underscore.to_sym

    if user && user.valid_token?(@token.token, @token.client)
      # sign_in with bypass: true will be deprecated in the next version of Devise
      if respond_to?(:bypass_sign_in) && DeviseTokenAuth.bypass_sign_in
        bypass_sign_in(user, scope: scope)
      else
        sign_in(scope, user, store: false, event: :fetch, bypass: DeviseTokenAuth.bypass_sign_in)
      end
      return @resource = user
    else
      # zero all values previously set values
      @token.client = nil
      return @resource = nil
    end
  end

うん、長い。

なので細かく切って読んでいきます。
まずは28行目のresource_class(mapping)メソッドの中身をみてみます。

resource_class(mapping)

    def resource_class(m = nil)
      if m
        mapping = Devise.mappings[m]
      else
        mapping = Devise.mappings[resource_name] || Devise.mappings.values.first
      end

      mapping.to
    end

コンソールで実行してみました。

$ mapping = Devise.mapping(:supervisor)
=> #<Devise::Mapping:0x00007fd079be3218
 @class_name="Supervisor",
 @controllers={:sessions=>"devise_token_auth/sessions", :registrations=>"devise_token_auth/registrations", :passwords=>"devise_token_auth/passwords", :confirmations=>"devise_token_auth/confirmations", :unlocks=>"devise_token_auth/unlocks"},
 @failure_app=Devise::FailureApp,
 @format=nil,
 @klass=#<Devise::Getter:0x00007fd079be30d8 @name="Supervisor">,
 @modules=[:database_authenticatable, :rememberable, :recoverable, :registerable, :validatable, :lockable, :trackable],
 @path="supervisor_auth",
 @path_names={:registration=>"", :new=>"new", :edit=>"edit", :sign_in=>"sign_in", :sign_out=>"sign_out", :password=>"password", :sign_up=>"sign_up", :cancel=>"cancel", :unlock=>"unlock"},
 @path_prefix=nil,
 @router_name=nil,
 @routes=[:session, :password, :registration, :unlock],
 @scoped_path="supervisors",
 @sign_out_via=:delete,
 @singular=:supervisor,
 @used_helpers=[:session, :password, :registration, :unlock],
 @used_routes=[:session, :password, :registration, :unlock]>

Devise::Mappingクラスのインスタンスが返ることがわかりました。

mappingにtoメソッドを呼び出してみます。

$ mapping.to
=> Supervisor(id: integer, ...)

Supervisorクラスがcallされることがわかりました。
なので、例えば

$ mapping.to.find(1)
=>  Supervisor Load (4.6ms)  SELECT `supervisors`.* FROM `supervisors` WHERE `supervisors`.`id` = 1 LIMIT 1
=> #<Supervisor id: 1, ...>

のように、ActiveRecordのメソッドを使えるようになっています。なので、

rc = resource_class(mapping)

の「rc」は、mappingで指定したActiveRecordクラスが返ることがわかりました。


DeviseTokenAuth.headers_names[:'...']

次に34 ~ 36行目をコンソールで実行してみます。

# gets the headers names, which was set in the initialize file
uid_name = DeviseTokenAuth.headers_names[:'uid']
access_token_name = DeviseTokenAuth.headers_names[:'access-token']
client_name = DeviseTokenAuth.headers_names[:'client']
$ DeviseTokenAuth.headers_names[:'uid']
=> "uid"
$ DeviseTokenAuth.headers_names[:'access-token']
=> "access-token"
$ DeviseTokenAuth.headers_names[:'client']
=> "client"

認証に必要なheader名が文字列で返ることがわかりました。

38行目 ~ 45行名

    # parse header for values necessary for authentication
    uid              = request.headers[uid_name] || params[uid_name]
    @token           = DeviseTokenAuth::TokenFactory.new unless @token
    @token.token     ||= request.headers[access_token_name] || params[access_token_name]
    @token.client ||= request.headers[client_name] || params[client_name]

    # client isn't required, set to 'default' if absent
    @token.client ||= 'default'

このコードもコンソールで実行してみましょう。
requestという変数があるので、authenticate_user!が実行されるcontroller内で適当なアクションにbinding.pryを記述して実行します。

$ uid = request.headers[uid_name] || params[uid_name]
=> "test+1@gmail.com"

# 既に@tokenが存在するので、nilが返っている
$ @token = DeviseTokenAuth::TokenFactory.new unless @token
=> nil

# @token.tokenが定義済みなので、値の変更は無かった
$ @token.token ||= request.headers[access_token_name] || params[access_token_name]
=> "N5TYQ0V6xBwwjx-lCXS21w"

# こちらも@token.clientが定義済み
$ @token.client ||= request.headers[client_name] || params[client_name]
=> "DQt_mQE0RPabC3CwoYv1RQ"

それほど難しいことはしていない印象ですね。
@tokenが未定義であれば、headersから渡ってきた認証用の情報をインスタンス変数のプロパティとして代入しています。

45行目も@token.clientが定義済みだったので、"default"は代入されません。

47行目 ~ 57行目

    # check for an existing user, authenticated via warden/devise, if enabled
    if DeviseTokenAuth.enable_standard_devise_support
      devise_warden_user = warden.user(mapping)
      if devise_warden_user && devise_warden_user.tokens[@token.client].nil?
        @used_auth_by_token = false
        @resource = devise_warden_user
        # REVIEW: The following line _should_ be safe to remove;
        #  the generated token does not get used anywhere.
        # @resource.create_new_auth_token
      end
    end

例によってコンソールです。

$ DeviseTokenAuth.enable_standard_devise_support
=> false

私の環境だとfalseが返りました。
何をしているのかよくわからないので、コメントアウト部分を訳してみます。

check for an existing user, authenticated via warden/devise, if enabled

有効になっている場合は、warden / deviseを介して認証された既存のユーザーを確認します

この値はどこで有効/無効を切り替えるんでしょうか。config/initializers/devise_token_auth.rbを見に行ってみましょう。

  # By default, only Bearer Token authentication is implemented out of the box.
  # If, however, you wish to integrate with legacy Devise authentication, you can
  # do so by enabling this flag. NOTE: This feature is highly experimental!
  # config.enable_standard_devise_support = false

ありました。これも訳してみます。

By default, only Bearer Token authentication is implemented out of the box. If, however, you wish to integrate with legacy Devise authentication, you can do so by enabling this flag. NOTE: This feature is highly experimental!

デフォルトでは、ベアラートークン認証のみがすぐに実装されます。 ただし、従来のDevise認証と統合する場合は、このフラグを有効にすることで統合できます。 注:この機能は非常に実験的です!

なるほど、47行目 ~ 57行目はDeviseを既に使用している場合の考慮の話のようですね。「この機能は非常に実験的です!」と書いてあるので、このパラメータをtrueにするのはちと怖いですね、、、


59行目 ~ 70行目

    # user has already been found and authenticated
    return @resource if @resource && @resource.is_a?(rc)

    # ensure we clear the client
    unless @token.present?
      @token.client = nil
      return
    end

    # mitigate timing attacks by finding by uid instead of auth token
    user = uid && rc.dta_find_by(uid: uid)
    scope = rc.to_s.underscore.to_sym

こちらもコンソール

# returnすると処理終わるので、if文以降を試しています
$ @resource && @resource.is_a?(rc)
=> true

英語のコメントアウトにもあるとおり、既に認証済みであれば、returnするようにしていますね。

unless文も、@tokenが存在しなければ処理を終わらせるようにしています。


68行目 ~ 85行目

ようやく終わりが見えてきました。

    # mitigate timing attacks by finding by uid instead of auth token
    user = uid && rc.dta_find_by(uid: uid)
    scope = rc.to_s.underscore.to_sym

    if user && user.valid_token?(@token.token, @token.client)
      # sign_in with bypass: true will be deprecated in the next version of Devise
      if respond_to?(:bypass_sign_in) && DeviseTokenAuth.bypass_sign_in
        bypass_sign_in(user, scope: scope)
      else
        sign_in(scope, user, store: false, event: :fetch, bypass: DeviseTokenAuth.bypass_sign_in)
      end
      return @resource = user
    else
      # zero all values previously set values
      @token.client = nil
      return @resource = nil
    end
  end

英語コメントアウトは、

mitigate timing attacks by finding by uid instead of auth token

認証トークンの代わりにuidで検索することにより、タイミング攻撃を軽減します

とのことでした。ロジックを追ってみます。

$ user = uid && rc.dta_find_by(uid: uid)
=> #<Supervisor id: 2, ...>

$ scope = rc.to_s.underscore.to_sym
=> :supervisor

$ user && user.valid_token?(@token.token, @token.client)
=> true

valid_token?の中身を見てみます。

app/models/devise_token_auth/concerns/user.rb

  def valid_token?(token, client = 'default')
    return false unless tokens[client]
    return true if token_is_current?(token, client)
    return true if token_can_be_reused?(token, client)

    # return false if none of the above conditions are met
    false
  end

token_is_current?を見る必要がありそう。

  def token_is_current?(token, client)
    # ghetto HashWithIndifferentAccess
    expiry     = tokens[client]['expiry'] || tokens[client][:expiry]
    token_hash = tokens[client]['token'] || tokens[client][:token]

    return true if (
      # ensure that expiry and token are set
      expiry && token &&

      # ensure that the token has not yet expired
      DateTime.strptime(expiry.to_s, '%s') > Time.zone.now &&

      # ensure that the token is valid
      DeviseTokenAuth::Concerns::User.tokens_match?(token_hash, token)
    )
  end

expiry(tokenの有効期限)とtokenをHash形式にしたものを取得して、現在日時とexpiryを比較、さらにtokenがmatchするかを見てますね。

tokens_match?メソッドも見てみましょう。

# app/models/devise_token_auth/concerns/user.rb

  def self.tokens_match?(token_hash, token)
    @token_equality_cache ||= {}

    key = "#{token_hash}/#{token}"
    result = @token_equality_cache[key] ||= DeviseTokenAuth::TokenFactory.token_hash_is_token?(token_hash, token)
    @token_equality_cache = {} if @token_equality_cache.size > 10000
    result
  end

token_hash_is_token?をみに行こう、、、(疲れた)

    def self.token_hash_is_token?(token_hash, token)
      BCrypt::Password.new(token_hash).is_password?(token)
    rescue StandardError
      false
    end

BCryptで暗号化されたパスワードならtrueが返る感じですね。

かなり追いましたが、token_is_current?メソッドはtokenのexpiryを見て、期限以内のものかどうかをチェックするメソッドでした。
名前から何をするメソッドなのかは容易に想像できましたが、どんな処理なのか知りたくなるのはエンジニアの性ですね。。。


token_can_be_reused?も見ないといかん。

# app/models/devise_token_auth/concerns/user.rb

  # allow batch requests to use the previous token
  def token_can_be_reused?(token, client)
    # ghetto HashWithIndifferentAccess
    updated_at = tokens[client]['updated_at'] || tokens[client][:updated_at]
    last_token_hash = tokens[client]['last_token'] || tokens[client][:last_token]

    return true if (
      # ensure that the last token and its creation time exist
      updated_at && last_token_hash &&

      # ensure that previous token falls within the batch buffer throttle time of the last request
      updated_at.to_time > Time.zone.now - DeviseTokenAuth.batch_request_buffer_throttle &&

      # ensure that the token is valid
      DeviseTokenAuth::TokenFactory.token_hash_is_token?(last_token_hash, token)
    )
  end

clientのupdated_atが存在し、最新のtokenがあることが前提

DeviseTokenAuth.batch_request_buffer_throttleはなんでしょう。
deive_token_authの設定ファイルを見に行ってみましょうか。

# your_app/config/initializers/devise_token_auth.rb

  # Sometimes it's necessary to make several requests to the API at the same
  # time. In this case, each request in the batch will need to share the same
  # auth token. This setting determines how far apart the requests can be while
  # still using the same auth token.
  # config.batch_request_buffer_throttle = 5.seconds

Sometimes it's necessary to make several requests to the API at the same time.
In this case, each request in the batch will need to share the same auth token.
This setting determines how far apart the requests can be while still using the same auth token.

APIに対して同時に複数のリクエストを行う必要がある場合があります。
この場合、バッチ内の各リクエストは同じ認証トークンを共有する必要があります。
この設定は、同じ認証トークンを使用しながら、リクエストをどれだけ離すことができるかを決定します。

複数リクエスト時のトークンの考慮の設定でした。

if user && user.valid_token?(@token.token, @token.client) は、tokenが有効かどうかをあらゆるconfigから検証にしに行く条件判定でしたね、、、

74行目のDeviseTokenAuth.bypass_sign_inを見てみましょう。

docに記載がありました。

By default DeviseTokenAuth will not check user's #active_for_authentication? which includes confirmation check on each call (it will do it only on sign in).
If you want it to be validated on each request (for example, to be able to deactivate logged in users on the fly), set it to false.

デフォルトでは、DeviseTokenAuthは、各呼び出しの確認チェックを含むユーザーの#active_for_authenticationをチェックしません(サインイン時にのみチェックします)。
リクエストごとに検証する場合(たとえば、ログインしているユーザーをその場で非アクティブ化できるようにする場合)は、falseに設定します。

リクエストごとに検証しない場合はtrueにすればいい感じですね。

残りは実際のログイン処理のようです。


疲れたのでここまでにします、、、(13000字超えた、こんなん誰が読むのだろうか、、、)

認証周りは自分で実装してはダメな理由がわかりましたね。

産業分類コード一覧(小分類)をCSVファイルにしました

こんにちは!kossyです!


さて、今回は日本標準産業分類の小分類のコードと名称を
CSVファイルにしましたので、ブログに残してみたいと思います。


日本標準産業分類とは?

https://www.soumu.go.jp/toukei_toukatsu/index/seido/sangyo/index.html

総務省が定めている産業分類で、大・中・小の3階層からなっています。

リンク

こちらに置きました。
https://docs.google.com/spreadsheets/d/1MXOCMYZf_m5w4v782FgkOLFE9L2WOs1_yU2cc-QhgCU

Gemがあるかと思ってたんですが、私の調べ方が悪かったのか無かったです。
作ってもいいかもなぁ。