devise-securityのsession_limitableモジュールのソースコードを追ってみた

こんにちは!kossyです!


さて、今回はdevise-securiyのsession_limitableのソースコードを追ってみたので、備忘録としてブログに残してみたいと思います。


環境

Ruby 2.6.8
Rails 6.0.4
MacOS BigSur
devise-security 0.16.1


前提

devise-securityのsession_limitableモジュールをincludeしたUserモデルが定義されているものとします。

Devise::Models::SessionLimitable

まずはモジュールのコードをさらっと確認してみます。

# 省略

module Devise
  module Models
    # SessionLimited ensures, that there is only one session usable per account at once.
    # If someone logs in, and some other is logging in with the same credentials,
    # the session from the first one is invalidated and not usable anymore.
    # The first one is redirected to the sign page with a message, telling that
    # someone used his credentials to sign in.
    module SessionLimitable
      extend ActiveSupport::Concern
      include Devise::Models::Compatibility

      # Update the unique_session_id on the model.  This will be checked in
      # the Warden after_set_user hook in {file:devise-security/hooks/session_limitable}
      # @param unique_session_id [String]
      # @return [void]
      # @raise [Devise::Models::Compatibility::NotPersistedError] if record is unsaved
      def update_unique_session_id!(unique_session_id)
        raise Devise::Models::Compatibility::NotPersistedError, 'cannot update a new record' unless persisted?

        update_attribute_without_validatons_or_callbacks(:unique_session_id, unique_session_id).tap do
          Rails.logger.debug { "[devise-security][session_limitable] unique_session_id=#{unique_session_id}" }
        end
      end

      # Should session_limitable be skipped for this instance?
      # @return [Boolean]
      # @return [false] by default. This can be overridden by application logic as necessary.
      def skip_session_limitable?
        false
      end
    end
  end
end

SessionLimited...から始まる部分をGoogle翻訳で訳してみます。

SessionLimited ensures, that there is only one session usable per account at once.
If someone logs in, and some other is logging in with the same credentials,
the session from the first one is invalidated and not usable anymore.
The first one is redirected to the sign page with a message, telling that someone used his credentials to sign in.

SessionLimitedは、アカウントごとに一度に使用できるセッションが1つだけであることを保証します。
誰かがログインし、他の誰かが同じ資格情報でログインしている場合、
最初のセッションからのセッションは無効になり、使用できなくなります。
最初のセッションは、誰かが自分の資格情報を使用してサインインしたことを通知するメッセージとともにサインページにリダイレクトされます。

平たく言ってしまうと、多重セッションを禁ずるモジュールですね。

上記の機能はどのようにして実現しているのでしょうか。


update_unique_session_id!

Devise::Models::SessionLimitableモジュールには2つのメソッドが定義されていて、そのうちの一つがupdate_unique_session_id!メソッドです。

コメントアウト部分を訳してみます。

Update the unique_session_id on the model. This will be checked in
the Warden after_set_user hook in {file:devise-security/hooks/session_limitable}

モデル内のunique_session_idをupdateします。
これはWardenのafter_set_userフック内でチェックされます。(fileはdevise-security/hooks/session_limitable)

session_limitableを使うときに必要になる、unique_session_idをWardenのafter_set_userフック内でupdateするメソッドのようです。

  def update_unique_session_id!(unique_session_id)
    raise Devise::Models::Compatibility::NotPersistedError, 'cannot update a new record' unless persisted?

    update_attribute_without_validatons_or_callbacks(:unique_session_id, unique_session_id).tap do
      Rails.logger.debug { "[devise-security][session_limitable] unique_session_id=#{unique_session_id}" }
    end
  end

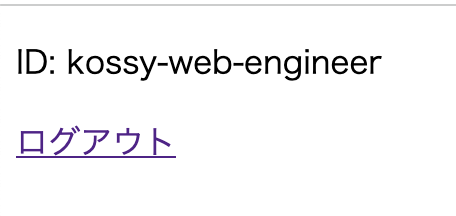
このメソッドをUserモデルに定義し、間にbinding.pryを挟んだ上で、ログインを試みます。

From: /app/app/models/supervisor.rb:94 Supervisor#update_unique_session_id!:

    90: def update_unique_session_id!(unique_session_id)
    91:   binding.pry
    92:   raise Devise::Models::Compatibility::NotPersistedError, 'cannot update a new record' unless persisted?
    93:
 => 94:   update_attribute_without_validatons_or_callbacks(:unique_session_id, unique_session_id).tap do
    95:     Rails.logger.debug { "[devise-security][session_limitable] unique_session_id=#{unique_session_id}" }
    96:   end
    97: end

$ unique_session_id
=> nil

$ persisted?
=> true


update_attribute_without_validatons_or_callbacksメソッドを読んでみる必要がありそう。

update_attribute_without_validatons_or_callbacks

pry-byebugを導入していると使える、stepメソッドを使って update_attribute_without_validatons_or_callbacks の処理を見てみます。

From: /usr/local/bundle/gems/devise-security-0.16.0/lib/devise-security/models/compatibility/active_record_patch.rb:34 Devise::Models::Compatibility::ActiveRecordPatch#update_attribute_without_validatons_or_callbacks:

    33: def update_attribute_without_validatons_or_callbacks(name, value)
 => 34:   update_column(name, value)
    35: end

$ name
=> :unique_session_id

$ value
=> "buGqJFwGDV1bmXa39fgY"

ActiveRecordのupdate_columnメソッドを呼び出している処理でした。

update_columnメソッドでattributeの更新を行っているため、updated_at/updated_onの更新は行われません、、、

参考: 週刊Railsウォッチ(20181210)update_columnは要注意、DBカラムコメントは書こう、個人情報扱いの注意点、Capistranoはやっぱりいいほか|TechRacho by BPS株式会社


Warden::Manager.after_set_user

update_unique_session_id!メソッドの呼び出し元はWarden::Managerクラスのafter_set_userフックでした。

# After each sign in, update unique_session_id. This is only triggered when the
# user is explicitly set (with set_user) and on authentication. Retrieving the
# user from session (:fetch) does not trigger it.
Warden::Manager.after_set_user except: :fetch do |record, warden, options|
  if record.devise_modules.include?(:session_limitable) &&
     warden.authenticated?(options[:scope]) &&
     !record.skip_session_limitable?

     if !options[:skip_session_limitable]
      unique_session_id = Devise.friendly_token
      warden.session(options[:scope])['unique_session_id'] = unique_session_id
      record.update_unique_session_id!(unique_session_id)
     else
      warden.session(options[:scope])['devise.skip_session_limitable'] = true
     end
  end
end

skip_session_limitableオプションがfalseでなければ、tokenを生成してwardenのsessionにunique_session_idを代入して、

.update_unique_session_id!メソッドを呼び出しています。

コメントアウト部分を訳してみます。

After each sign in, update unique_session_id.
This is only triggered when the user is explicitly set (with set_user) and on authentication.
Retrieving the user from session (:fetch) does not trigger it.

サインインするたびに、unique_session_idを更新します。
これは、ユーザーが(set_userを使用して)明示的に設定され、認証された場合にのみトリガーされます。
セッション(:fetch)からユーザーを取得しても、トリガーされません。

呼び出されるタイミングが記載されていました。

skip_session_limitable?

      # Should session_limitable be skipped for this instance?
      # @return [Boolean]
      # @return [false] by default. This can be overridden by application logic as necessary.
      def skip_session_limitable?
        false
      end

コメントアウト部分を意訳してみます。

Should session_limitable be skipped for this instance?
@return [Boolean]
@return [false] by default. This can be overridden by application logic as necessary.

session_limitableをスキップする必要があるかどうかを制御できます。
もしスキップしたい場合は必要に応じてアプリケーションロジックによって上書きできます。

trueを返すようにすれば、unique_session_idカラムの値を更新しなくなるようでした。

まとめ

update_columnを使っているため、timestamp機能が有効でもupdated_at/updated_on属性が更新されない問題があるみたいです、、、

自力で直せるか検討してみたんですが、Railsのtimestamp機能のprivateメソッドを直に呼び出すような案しか思いつきませんでした。

OSSコントリビュートのチャンスだと思うんですが、思ったよりも考慮事項が多そうに思いました。どこかで直したいけど。

devise-securityのsession_limitableを使ってみる

こんにちは!kossyです!


さて、今回は認証機能を提供するGem「devise」のextensionで、エンタープライズな認証機能を実現する

devise-securityのsession_limitableを使ってみたので、備忘録としてブログに残してみたいと思います。


環境

Ruby 2.6.8
Rails 6.0.4
MacOS BigSur
devise-security 0.16.1


session_limitableとは?

1アカウント1セッションであることを強制する、いわゆる「多重セッション」を禁止するモジュールです。

多重セッションの禁止とは、例えばスマホTwitterにログインした状態でPCからTwitterにログインすると、スマホ側のTwitterのセッションが切れることを指します。

導入

既にdeviseの導入とdeviseの各種モジュールをincludeしたモデル(User)が定義されているものとします。

Gemfileにdevise-securiyを追加

gem 'devise-security'

でbundle

$ bundle

Userモデルにsession_limitableモジュールで使うカラムを追加します。

class AddUniqueSessionIdToUsers < ActiveRecord::Migration[6.0]
  def change
    add_column :users, :unique_session_id, :string
  end
end

rails db:migrate

$ rails db:migrate

次にUserモデルにsession_limitableモジュールを追加します。

devise :session_limitable

これで導入は完了です。


動作確認

複数ブラウザを立ち上げて動作を確認してみます。

chromeでログイン

f:id:kossy-web-engineer:20211128232921p:plain

その後safariでログイン

f:id:kossy-web-engineer:20211128233024p:plain

その後chromeの方をリロードすると、ログアウト画面に遷移する(sessionが切れている)

f:id:kossy-web-engineer:20211128233058p:plain


動作の確認が取れました。

まとめ

動作確認していて思ったのですが、複数環境でのログインそのものはできるんですね。セッションが生きている状態でログインを試みたら、ログインに失敗する機能かと勘違いしていました。

session_limitableを検索すると、「多重ログイン」という文言が出てくるのですが、

本ブログでは「多重セッション」という言葉を選んでいます。多重ログイン自体は可能のようだからですね。

あと、unique_session_idの更新時にupdated_atの値が更新されていないようでした。

Railsの場合、レコードに変更が加わると自動でupdated_atが更新されるんですが、なぜ更新がされていないのか、原因を追ってみたくなりました。

ruby-samlで「Invalid Signature on SAML Response」が返ってきた場合の調査方法

こんにちは!kossyです!


今回はSSOを実現するGem「ruby-saml」で「Invalid Signature on SAML Response」が返ってきた場合の調査方法について、

備忘録としてブログに残してみたいと思います。


環境
Ruby 2.6.8
Rails 6.0.4
MacOS BigSur
ruby-saml 1.13.0


なお、サンプルのアプリケーションはoneloginが提供している以下のアプリを使っているものとします。

github.com

コードリーディング

fail.html.erbをレンダリングしている処理はこちらでした。

  def acs
    settings = Account.get_saml_settings(get_url_base)
    response = OneLogin::RubySaml::Response.new(params[:SAMLResponse], settings: settings)

    if response.is_valid?
      session[:nameid] = response.nameid
      session[:attributes] = response.attributes
      @attrs = session[:attributes]
      logger.info "Sucessfully logged"
      logger.info "NAMEID: #{response.nameid}"
      render :action => :index
    else
      logger.info "Response Invalid. Errors: #{response.errors}"
      @errors = response.errors
      render :action => :fail
    end
  end

なので、acsアクションにbinding.pryを定義し、pry-byebug Gemを入れることで使えるようになるstepメソッドを使って、

原因を探りたいと思います。

    20: def acs
    21:   settings = Account.get_saml_settings(get_url_base)
    22:   response = OneLogin::RubySaml::Response.new(params[:SAMLResponse], settings: settings)
    23:
    24:   binding.pry
    25:
 => 26:   if response.is_valid?
    27:     session[:nameid] = response.nameid
    28:     session[:attributes] = response.attributes
    29:     @attrs = session[:attributes]
    30:     logger.info "Sucessfully logged"
    31:     logger.info "NAMEID: #{response.nameid}"
    32:     render :action => :index
    33:   else
    34:     logger.info "Response Invalid. Errors: #{response.errors}"
    35:     @errors = response.errors
    36:     render :action => :fail
    37:   end
    38: end


$ response.is_valid?
=> false

$ step

From: /usr/local/bundle/gems/ruby-saml-1.13.0/lib/onelogin/ruby-saml/response.rb:79 OneLogin::RubySaml::Response#is_valid?:

    78: def is_valid?(collect_errors = false)
 => 79:   validate(collect_errors)
    80: end

$ step

      # Validates the SAML Response (calls several validation methods)
      # @param collect_errors [Boolean] Stop validation when first error appears or keep validating. (if soft=true)
      # @return [Boolean] True if the SAML Response is valid, otherwise False if soft=True
      # @raise [ValidationError] if soft == false and validation fails
      #
      def validate(collect_errors = false)
        reset_errors!
        return false unless validate_response_state

        validations = [
          :validate_version,
          :validate_id,
          :validate_success_status,
          :validate_num_assertion,
          :validate_no_duplicated_attributes,
          :validate_signed_elements,
          :validate_structure,
          :validate_in_response_to,
          :validate_one_conditions,
          :validate_conditions,
          :validate_one_authnstatement,
          :validate_audience,
          :validate_destination,
          :validate_issuer,
          :validate_session_expiration,
          :validate_subject_confirmation,
          :validate_name_id,
          :validate_signature
        ]

        if collect_errors
          validations.each { |validation| send(validation) }
          @errors.empty?
        else
          validations.all? { |validation| send(validation) }
        end
      end

# ですよね()という結果
$  validations.all? { |validation| send(validation) }
=> false

実際にvalidationを実行しているのは、send(validation)の部分ですね。

ここは全て読むのは辛いので、「Invalid Signature」でruby-samlのコードを検索してみます。

      # Validates the Signature
      # @return [Boolean] True if not contains a Signature or if the Signature is valid, otherwise False if soft=True
      # @raise [ValidationError] if soft == false and validation fails
      #
      def validate_signature
        error_msg = "Invalid Signature on SAML Response"

        # If the response contains the signature, and the assertion was encrypted, validate the original SAML Response
        # otherwise, review if the decrypted assertion contains a signature
        sig_elements = REXML::XPath.match(
          document,
          "/p:Response[@ID=$id]/ds:Signature",
          { "p" => PROTOCOL, "ds" => DSIG },
          { 'id' => document.signed_element_id }
        )

        use_original = sig_elements.size == 1 || decrypted_document.nil?
        doc = use_original ? document : decrypted_document

        # Check signature nodes
        if sig_elements.nil? || sig_elements.size == 0
          sig_elements = REXML::XPath.match(
            doc,
            "/p:Response/a:Assertion[@ID=$id]/ds:Signature",
            {"p" => PROTOCOL, "a" => ASSERTION, "ds"=>DSIG},
            { 'id' => doc.signed_element_id }
          )
        end

        if sig_elements.size != 1
          if sig_elements.size == 0
             append_error("Signed element id ##{doc.signed_element_id} is not found")
          else
             append_error("Signed element id ##{doc.signed_element_id} is found more than once")
          end
          return append_error(error_msg)
        end

        old_errors = @errors.clone

        idp_certs = settings.get_idp_cert_multi
        if idp_certs.nil? || idp_certs[:signing].empty?
          opts = {}
          opts[:fingerprint_alg] = settings.idp_cert_fingerprint_algorithm
          idp_cert = settings.get_idp_cert
          fingerprint = settings.get_fingerprint
          opts[:cert] = idp_cert

          if fingerprint && doc.validate_document(fingerprint, @soft, opts)
            if settings.security[:check_idp_cert_expiration]
              if OneLogin::RubySaml::Utils.is_cert_expired(idp_cert)
                error_msg = "IdP x509 certificate expired"
                return append_error(error_msg)
              end
            end
          else
            return append_error(error_msg)
          end
        else
          valid = false
          expired = false
          idp_certs[:signing].each do |idp_cert|
            valid = doc.validate_document_with_cert(idp_cert, true)
            if valid
              if settings.security[:check_idp_cert_expiration]
                if OneLogin::RubySaml::Utils.is_cert_expired(idp_cert)
                  expired = true
                end
              end

              # At least one certificate is valid, restore the old accumulated errors
              @errors = old_errors
              break
            end

          end
          if expired
            error_msg = "IdP x509 certificate expired"
            return append_error(error_msg)
          end
          unless valid
            # Remove duplicated errors
            @errors = @errors.uniq
            return append_error(error_msg)
          end
        end

        true
      end


validate_signatureメソッドがエラーメッセージを返していそうなので、処理を追ってみます。

$ send(:validate_signature)
=> false

# stepでvalidate_signatureメソッドの内部に移動

# どうやらここがfalseなのが原因
$ if fingerprint && doc.validate_document(fingerprint, @soft, opts)
=> false

$ fingerprint
=> "AB:CD:EF:AB:CD:EF:A1:B2:C3:D4:E5:F6:94:C1:B5:8B:00:23:0A:D8:3D:1B:55:DF:41:EA:42:5F:9E:62:07:85"

$ doc.validate_document(fingerprint, @soft, opts)
=> false

どうやらfingerprintが間違っているのが原因のようです。

    # IdP section
    settings.idp_entity_id                  = "#{idp_base_url}/#{ENV['IDP_GROUP_NAME']}"
    settings.idp_sso_target_url             = "#{idp_base_url}/idp/#{ENV['IDP_GROUP_NAME']}"
    settings.idp_slo_target_url             = "#{idp_base_url}/idp/#{ENV['IDP_GROUP_NAME']}/logout"
    settings.idp_cert_fingerprint           = "#{ENV['IDP_FINGERPRINT']}"
    settings.idp_cert_fingerprint_algorithm = XMLSecurity::Document::SHA256

settings.idp_cert_fingerprint属性の値に正しいfingerprintを渡してやればOKでした。


まとめ

もし本番運用で「Invalid Signature on SAML Response」に遭遇して、原因が「fingerprintの値が間違っている」だったとして、

原因を特定するまでにかなりの労力を使うような気がしています、、、(エラーメッセージが不親切)

XmlSecurityモジュールのvalidate_documentメソッドも読んでみようと思ったんですが、何をしているのかさっぱりわからなかったので、

Pull Requestのコメントやcommitメッセージを読みつつコードリーディングを進めるのと、

そもそもなぜSAMLによるSSO認証にfingerprintが使われているか、等を調べて知見を深めようと思います、、、

ruby-samlで「Invalid settings, idp_sso_service_url is not set!」が発生した場合の対処法

こんにちは!kossyです!


今回はSSOを実現するGem「ruby-saml」で「Invalid settings, idp_sso_service_url is not set!」が発生した場合の対処法について、

備忘録としてブログに残してみたいと思います。


環境
Ruby 2.6.8
Rails 6.0.4
MacOS BigSur
ruby-saml 1.13.0


エラーの発生箇所のコードリーディング

まずはどこで例外が投げられているのか、binding.pryで処理を止めて、

pry-byebug Gemを入れると使用できるstepコマンドを使いながら確認してみます。

class SamlController < ApplicationController
  skip_before_action :verify_authenticity_token, :only => [:acs, :logout]

  # 省略

  def sso
    settings = Account.get_saml_settings(get_url_base)
    if settings.nil?
      render :action => :no_settings
      return
    end

    request = OneLogin::RubySaml::Authrequest.new

    binding.pry
    redirect_to(request.create(settings))
  end

  # 省略
end

localhost:3000/saml/sso にアクセスすると、処理が止まります。

From: /app/app/controllers/saml_controller.rb:18 SamlController#sso:

     8: def sso
     9:   settings = Account.get_saml_settings(get_url_base)
    10:   if settings.nil?
    11:     render :action => :no_settings
    12:     return
    13:   end
    14:
    15:   request = OneLogin::RubySaml::Authrequest.new
    16:
    17:   binding.pry
 => 18:   redirect_to(request.create(settings))
    19: end

この状態でstepコマンドでcreateメソッドの処理を見に行ってみます。

From: /usr/local/bundle/gems/ruby-saml-1.13.0/lib/onelogin/ruby-saml/authrequest.rb:37 OneLogin::RubySaml::Authrequest#create:

    36: def create(settings, params = {})
 => 37:   params = create_params(settings, params)
    38:   params_prefix = (settings.idp_sso_service_url =~ /\?/) ? '&' : '?'
    39:   saml_request = CGI.escape(params.delete("SAMLRequest"))
    40:   request_params = "#{params_prefix}SAMLRequest=#{saml_request}"
    41:   params.each_pair do |key, value|
    42:     request_params << "&#{key.to_s}=#{CGI.escape(value.to_s)}"
    43:   end
    44:   raise SettingError.new "Invalid settings, idp_sso_service_url is not set!" if settings.idp_sso_service_url.nil? or settings.idp_sso_service_url.empty?
    45:   @login_url = settings.idp_sso_service_url + request_params
    46: end

44行目が今回の例外をraiseしているところですね。

$  settings.idp_sso_service_url.nil? or settings.idp_sso_service_url.empty?
=> true

true が返りました。 タイトルの例外が生じた原因は、settingsオブジェクトのidp_sso_service_url属性がnilまたは空だったからですね。

idp_sso_service_urlはsettingsオブジェクトのメソッドになっていました。

github.com

      # @return [String] IdP Single Sign On Service URL
      #
      def idp_sso_service_url
        @idp_sso_service_url || @idp_sso_target_url
      end

idp_sso_service_url属性がDBに保存されているか、はたまたconfig値を引っ張ってきているかは各々のアプリケーション次第かと思いますが、

settingsオブジェクトの生成時に、idp_sso_service_url属性に値が必ず入るようにすればOKそうですね。


まとめ

ruby-samlのReadMe通りに実装してテストしているときにはあまり遭遇しないかもしれませんが、

DBから値を引っ張ってくるような構成の場合は、きちんと制約をかけてあげていないと、ハマってしまうかもしれませんね。

github.com


大いに参考にさせていただいたサイト

素晴らしいコンテンツの提供、誠にありがとうございます。

ruby-saml/README.md at master · onelogin/ruby-saml · GitHub

devise_saml_authenticatableのSamlAuthenticatable::SamlResponseのソースコードを追ってみる

こんにちは!kossyです!


今回は、前回のブログで追いきれなかった、SamlAuthenticatable::SamlResponseのソースコードを追ってみようと思います。

前回のブログ

kossy-web-engineer.hatenablog.com


環境
Ruby 2.6.8
Rails 6.0.4
MacOS BigSur
devise_saml_authenticatable 1.7.0


呼び出し元のおさらい

呼び出し元の処理はこちらでした。

github.com

def authenticate_with_saml(saml_response, relay_state)
  key = Devise.saml_default_user_key
  decorated_response = ::SamlAuthenticatable::SamlResponse.new(
    saml_response,
    attribute_map(saml_response),
  )
  if Devise.saml_use_subject
    auth_value = saml_response.name_id
  else
    auth_value = decorated_response.attribute_value_by_resource_key(key)
  end
  auth_value.try(:downcase!) if Devise.case_insensitive_keys.include?(key)

  resource = Devise.saml_resource_locator.call(self, decorated_response, auth_value)

  raise "Only one validator configuration can be used at a time" if Devise.saml_resource_validator && Devise.saml_resource_validator_hook
  if Devise.saml_resource_validator || Devise.saml_resource_validator_hook
    valid = if Devise.saml_resource_validator then Devise.saml_resource_validator.new.validate(resource, saml_response)
            else Devise.saml_resource_validator_hook.call(resource, decorated_response, auth_value)
            end
    if !valid
      logger.info("User(#{auth_value}) did not pass custom validation.")
      return nil
    end
  end

  if resource.nil?
    if Devise.saml_create_user
      logger.info("Creating user(#{auth_value}).")
      resource = new
    else
      logger.info("User(#{auth_value}) not found.  Not configured to create the user.")
      return nil
    end
  end

  if Devise.saml_update_user || (resource.new_record? && Devise.saml_create_user)
    Devise.saml_update_resource_hook.call(resource, decorated_response, auth_value)
  end

  resource
end

authenticate_with_samlメソッドの中で、SamlAuthenticatable::SamlResponse.newが呼び出されていましたね。


SamlAuthenticatable::SamlResponseクラス

github.com

改行を含めても16行の小さいクラスでした。

require 'devise_saml_authenticatable/saml_mapped_attributes'

module SamlAuthenticatable
  class SamlResponse
    attr_reader :raw_response, :attributes

    def initialize(saml_response, attribute_map)
      @attributes = ::SamlAuthenticatable::SamlMappedAttributes.new(saml_response.attributes, attribute_map)
      @raw_response = saml_response
    end

    def attribute_value_by_resource_key(key)
      attributes.value_by_resource_key(key)
    end
  end
end

initializeメソッドの中で SamlAuthenticatable::SamlMappedAttributesというクラスがnewされていますので、処理を見てみます。

と思ったんですが、authenticate_with_samlメソッドの中でattribute_mapというメソッドが呼ばれてますね、、、こちらから見てみましょうか。

attribute_map

定義元はSamlAuthenticatableモジュールの84行目です。

github.com

def attribute_map(saml_response = nil)
  attribute_map_resolver.new(saml_response).attribute_map
end

def attribute_map_resolver
  if Devise.saml_attribute_map_resolver.respond_to?(:new)
    Devise.saml_attribute_map_resolver
  else
    Devise.saml_attribute_map_resolver.constantize
  end
end

Devise.saml_attribute_map_resolverに対して、newが定義されていれば Devise.saml_attribute_map_resolver.newを呼び出し、

newが定義されていなければ Devise.saml_attribute_map_resolverをcontantizeメソッドで文字列をクラス化した後にnewを呼び出していました。

github.com

module DeviseSamlAuthenticatable
  class DefaultAttributeMapResolver
    def initialize(saml_response)
      @saml_response = saml_response
    end

    def attribute_map
      return {} unless File.exist?(attribute_map_path)

      attribute_map = YAML.load(File.read(attribute_map_path))
      if attribute_map.key?(Rails.env)
        attribute_map[Rails.env]
      else
        attribute_map
      end
    end

    private

    attr_reader :saml_response

    def attribute_map_path
      Rails.root.join("config", "attribute-map.yml")
    end
  end
end

initializeメソッドでは引数で渡されたsaml_responseをインスタンス変数に代入しているだけですね。

attribute_mapメソッドは、configディレクトリ直下にattribute_map.ymlファイルが存在していなければ {} を返却し、

存在していれば、YAML.loadで読み出して、attribute_mal.ymlにproduction: のように環境毎に定義が分かれていれば、その環境の値を読み出し、

定義が分かれていなければ全てのattribute_map.ymlの値を返しています。この実装方法、他にも応用が効きそうな気がしています。

attribute_map.ymlファイルの中身はこんな感じになるかと思います。

"urn:mace:dir:attribute-def:email": "email"

SAMLの属性とdeviseの属性をmappingする用途で使っています。

この辺りはコンソールで試してみましょうか。

# Instead of storing the attribute_map in attribute-map.yml, store it in the database, or set it programatically
# attribute_mapをattribute-map.ymlに保存する代わりに、データベースに保存するか、プログラムで設定します

# 私の環境ではfalseが返りました。
$ Devise.saml_attribute_map_resolver.respond_to?(:new)
=> false

# newは DeviseSamlAuthenticatable::DefaultAttributeMapResolver に対して呼び出される
$ Devise.saml_attribute_map_resolver.constantize
=> DeviseSamlAuthenticatable::DefaultAttributeMapResolver

# 私の環境ではattribute-map.ymlを定義しているので返り値が存在する
$ attribute_map_path
=> #<Pathname:/app/config/attribute-map.yml>

$ File.exist?(attribute_map_path)
=> true

$ attribute_map
=> {"urn:mace:dir:attribute-def:email"=>"email"}

attribute_mapメソッドの動きが理解できたところで、 SamlAuthenticatable::SamlResponseクラスに戻ります。

SamlAuthenticatable::SamlMappedAttributesクラス

deviseとsaml_responseのattrのmappingを担当するクラスですね。

github.com

module SamlAuthenticatable
  class SamlMappedAttributes
    def initialize(attributes, attribute_map)
      @attributes = attributes
      @attribute_map = attribute_map
    end

    def saml_attribute_keys
      @attribute_map.keys
    end

    def resource_keys
      @attribute_map.values
    end

    def value_by_resource_key(key)
      str_key = String(key)

      # Find all of the SAML attributes that map to the resource key
      attribute_map_for_key = @attribute_map.select { |_, resource_key| String(resource_key) == str_key }

      saml_value = nil

      # Find the first non-nil value
      attribute_map_for_key.each_key do |saml_key|
        saml_value = value_by_saml_attribute_key(saml_key)

        break unless saml_value.nil?
      end

      saml_value
    end

    def value_by_saml_attribute_key(key)
      @attributes[String(key)]
    end
  end
end

initialize時に引数で渡ってきたSamlResponseの属性を基に、attribute_mapの値と比較しつつ、合致した値を返却するような処理が含まれていました。

こちらもコンソールで試してみましょう。

$ decorated_response.attribute_value_by_resource_key(key)
=> nil

# stepでメソッド内部に入り込んでなぜnilが返るのか検証してみました

    16: def value_by_resource_key(key)
 => 17:   str_key = String(key)
    18:
    19:   # Find all of the SAML attributes that map to the resource key
    20:   attribute_map_for_key = @attribute_map.select { |_, resource_key| String(resource_key) == str_key }
    21:
    22:   saml_value = nil
    23:
    24:   # Find the first non-nil value
    25:   attribute_map_for_key.each_key do |saml_key|
    26:     saml_value = value_by_saml_attribute_key(saml_key)
    27:
    28:     break unless saml_value.nil?
    29:   end
    30:
    31:   saml_value
    32: end

$ key
=> :email

$ str_key = String(key)
=> "email"

$  attribute_map_for_key = @attribute_map.select { |_, resource_key| String(resource_key) == str_key }
=> {"urn:mace:dir:attribute-def:email"=>"email"}

    34: def value_by_saml_attribute_key(key)
 => 35:   @attributes[String(key)]
    36: end

# @attributesがそもそも{}だったからでした
$  @attributes[String(key)]
=> nil

概ね挙動の理解ができました。

まとめ

SAMLResponseとdeviseのattrのマッピングの実現方法は、普段の実装でも活かせるような気がしています。(ymlファイルの読み込み等々)

一通り挙動を追ってみて思ったのですが、やはりSAMLによるSSO周りの仕様の理解が追いついてないのをコードを読めば読むほど痛感しますね、、、

近いうちに、「この値を設定していないとこのレスポンスが返ってくる」とか、
「この値が間違っているとこのエラーになる」みたいなのを体当たりで検証してみたいと思います。(IdP側のコードも読んでみたいな、、、)

DeviseベースでSAML SSOを実現する 「devise_saml_authenticatable」のソースコードを追ってみた

こんにちは!kossyです!


今回は、DeviseベースでSAML SSOを実現する 「devise_saml_authenticatable」のソースコードを追ってみたので、備忘録としてブログに残してみたいと思います。


環境

Ruby 2.6.8
Rails 6.0.4
MacOS BigSur
devise 4.8.0
devise_saml_authenticatable 1.7.0


newアクション

github.com

上記のセクションを見ると、

The attribute mappings are very dependent on the way the IdP encodes the attributes. In these examples the attributes are given in URN style. Other IdPs might provide them as OID's, or by other means.

属性マッピングは、IdPが属性をエンコードする方法に大きく依存します。 これらの例では、属性はURNスタイルで指定されています。 他のIdPは、それらをOIDとして、または他の手段で提供する場合があります。

You are now ready to test it against an IdP.

これで、IdPに対してテストする準備が整いました。

When the user visits /users/saml/sign_in they will be redirected to the login page of the IdP.

ユーザーが/ users / saml / sign_inにアクセスすると、IdPのログインページにリダイレクトされます。

Upon successful login the user is redirected to the Devise user_root_path.

ログインに成功すると、ユーザーはDeviseのuser_root_pathにリダイレクトされます。

出典: https://github.com/apokalipto/devise_saml_authenticatable#configuring-handling-of-idp-requests-and-responses

とのことなので、まずはsaml_sessions_controller.rbのnewアクションのソースコードから追ってみます。

def new
  idp_entity_id = get_idp_entity_id(params)
  request = OneLogin::RubySaml::Authrequest.new
  auth_params = { RelayState: relay_state } if relay_state
  action = request.create(saml_config(idp_entity_id), auth_params || {})
  if request.respond_to?(:request_id)
    session[:saml_transaction_id] = request.request_id
  end
  redirect_to action
end

まずはget_idp_entity_idメソッドから見てみます。

def get_idp_entity_id(params)
  idp_entity_id_reader.entity_id(params)
end

# idp_entity_id_readerメソッドはこちら
def idp_entity_id_reader
  if Devise.idp_entity_id_reader.respond_to?(:entity_id)
    Devise.idp_entity_id_reader
  else
    @idp_entity_id_reader ||= Devise.idp_entity_id_reader.constantize
  end
end

Devise Moduleのidp_entity_id_readerにentity_idが生えて入れば、idp_entity_id_readerを返却し、

そうでなければDevise.idp_entity_id_reader.constantizeを実行してインスタンス変数としています。(DeviseSamlAuthenticatable::DefaultIdpEntityIdReaderクラスが返ります)

DeviseSamlAuthenticatable::DefaultIdpEntityIdReaderとはどんなクラスでしょうか。

module DeviseSamlAuthenticatable
  class DefaultIdpEntityIdReader
    def self.entity_id(params)
      if params[:SAMLRequest]
        OneLogin::RubySaml::SloLogoutrequest.new(
          params[:SAMLRequest],
          settings: Devise.saml_config,
          allowed_clock_drift: Devise.allowed_clock_drift_in_seconds,
        ).issuer
      elsif params[:SAMLResponse]
        OneLogin::RubySaml::Response.new(
          params[:SAMLResponse],
          settings: Devise.saml_config,
          allowed_clock_drift: Devise.allowed_clock_drift_in_seconds,
        ).issuers.first
      end
    end
  end
end

paramsを見てSAMLのログアウトリクエスインスタンスを生成してissuerを返却するか、

SAMLレスポンスのissuerを返却するかを司るクラスでした。

binding.pryで処理を止めて試したところ、idp_entity_idはnilが返りました。(ifにもelsifにも引っかからないので当然ですが)

その後の処理はSAMLRequestを生成して、SAMLのConfigを元にURL(= action)を生成してそのURLにリダイレクトさせています。

URLは以下のようなものです。

"https://idp_endpoint.com/saml2/idp/?SAMLRequest=hVPBjtowEP2V3HwKMSHb2bUIEgVVRdq2CNIe9rJynEmx4tipZ1Lo39cJUHFo6SGy5HnvzZvnyRxlazqx7Olgd%2FCjB6RoiQietLMrZ7Fvwe%2FB%2F9QKvu5ecnYg6kSSGKekOTgkMeOcJ31gYDJoJTJIsWgdhLSVg8qZg4E0lCZH5xtsXakNTJRrR1Ka6KpLGtDYN9A4POhGHiWLNuucvXFeVTWvVfyclTzOnrIsLqfveFyWz2n46qcH%2FhigiD1sLJK0lLOUp9N4yuMZL%2FiDmD2KjL%2ByaOsdOeXMe20rbb%2FnrPdWOIkahZUtoCAl9stPLyKdcFGeQSg%2BFsU23n7ZFyz6FqYcJwoAFp1aY1EM%2Fu8ryWuet5TuPqe7WGWL%2BYAW43h%2B8d%2F0WyBZSZLz5JY2P7%2Fy59Bms946o9WvaGmMO648SIKcke%2BBRR%2BcbyXdNzbc6CquR6ggLy1qsMSSa5PLFkE17lRYIYITRSvXdtJrHMKDk1R0HewWtTIhqh3Ui7tpKqEGXLjehiOsUzW8K6jQshjsdM7TZfy%2Fip9r%2FzD6p3r7Ryx%2BAw%3D%3D"

OneLogin::RubySaml::Authrequestのコードリーディングは以前書いた拙著でも取り上げています。

kossy-web-engineer.hatenablog.com

createアクション

saml_sessions_controller.rbにはcreateアクションは実装されていませんので、Devise::SessionsControllerのcreateアクションを見てみます。

  # POST /resource/sign_in
  def create
    self.resource = warden.authenticate!(auth_options)
    set_flash_message!(:notice, :signed_in)
    sign_in(resource_name, resource)
    yield resource if block_given?
    respond_with resource, location: after_sign_in_path_for(resource)
  end

createアクションの肝はwarden.authenticate!です。

こちら、まずはbinding.pryでデバッグしながらコードを追ってみます。

  # POST /resource/sign_in
  def create
    binding.pry
    self.resource = warden.authenticate!(auth_options)
    set_flash_message!(:notice, :signed_in)
    sign_in(resource_name, resource)
    yield resource if block_given?
    respond_with resource, location: after_sign_in_path_for(resource)
  end

/users/saml/sign_in にアクセスして、IdP側で認証処理を行った後、SPにリダイレクトするときにcreateアクションが呼ばれます。

pry-byebug Gemのstepメソッドを利用してwarden.authenticate!の処理の詳細を追ってみます。

$ step

$ From: /usr/local/bundle/gems/warden-1.2.9/lib/warden/proxy.rb:133 Warden::Proxy#authenticate!:

def authenticate!(*args)
  user, opts = _perform_authentication(*args)
  throw(:warden, opts) unless user
  user
end

# 何度かstepを実行

$ /usr/local/bundle/gems/warden-1.2.9/lib/warden/proxy.rb:354 Warden::Proxy#_run_strategies_for:

# Run the strategies for a given scope
def _run_strategies_for(scope, args) #:nodoc:
  self.winning_strategy = @winning_strategies[scope]
  return if winning_strategy && winning_strategy.halted?

  # Do not run any strategy if locked
  return if @locked

  if args.empty?
    defaults   = @config[:default_strategies]
    strategies = defaults[scope] || defaults[:_all]
  end

  (strategies || args).each do |name|
    strategy = _fetch_strategy(name, scope)
    next unless strategy && !strategy.performed? && strategy.valid?
    catch(:warden) do
      _update_winning_strategy(strategy, scope)
    end

    strategy._run!
    _update_winning_strategy(strategy, scope)
    break if strategy.halted?
  end
end

$ self.winning_strategy = @winning_strategies[scope]
=> nil

$ args.empty?
=> true

$ defaults   = @config[:default_strategies]
=> {:user=>[:saml_authenticatable, :rememberable, :database_authenticatable]} # Userモデルの devise メソッドに指定したモジュールの一部が列挙されます

$  strategies = defaults[scope] || defaults[:_all]
=> [:saml_authenticatable, :rememberable, :database_authenticatable]

# 何度かstep

$ /usr/local/bundle/gems/warden-1.2.9/lib/warden/proxy.rb:380 Warden::Proxy#_fetch_strategy:

# Fetches strategies and keep them in a hash cache.
def _fetch_strategy(name, scope)
  @strategies[scope][name] ||= if klass = Warden::Strategies[name]
    klass.new(@env, scope)
  elsif @config.silence_missing_strategies?
    nil
  else
    raise "Invalid strategy #{name}"
  end
end

$ @strategies[scope][name]
=> nil

$ klass = Warden::Strategies[name]
=> :saml_authenticatable

# 何度かstepし _run_strategies_for に戻る

$ strategy.class
=>  Devise::Strategies::SamlAuthenticatable

ここでようやく Devise::Strategies::SamlAuthenticatable クラスのインスタンスが登場しました。

この後、 strategy.valid? で Devise::Strategies::SamlAuthenticatableのvalid?メソッドが呼ばれます。

github.com

def valid?
  if params[:SAMLResponse]
    OneLogin::RubySaml::Response.new(
      params[:SAMLResponse],
      response_options,
    )
  else
    false
  end
end

params[:SAMLResponse]が存在していれば OneLogin::RubySaml::Responseインスタンスが返り値となり、なければfalseが返ります。

余談なんですが、Rubyは基本的にメソッドの接尾辞に?がついている場合はTrue or False を返す慣習があると思っていたのですが、

当該コードはその慣習に従ってないですね、、、少しモヤモヤします。

また何度かstepとnextを実行していると、 Devise::Strategies::SamlAuthenticatable#authenticate!が実行されます。

def authenticate!
  parse_saml_response
  retrieve_resource unless self.halted?
  unless self.halted?
    @resource.after_saml_authentication(@response.sessionindex)
    success!(@resource)
  end
end

SamlResponseをparseして、 strategyの実行が中止されていなければ retrieve_resource を実行しています。

halted?はwardenのコードです。

github.com

def retrieve_resource
  @resource = mapping.to.authenticate_with_saml(@response, params[:RelayState])
  if @resource.nil?
    failed_auth("Resource could not be found")
  end
end

mappingは一体何でしょう。

$ mapping.class
=> Devise::Mapping

$  /usr/local/bundle/gems/devise-4.8.0/lib/devise/strategies/base.rb:14 Devise::Strategies::Base#mapping:

def mapping
  @mapping ||= begin
    mapping = Devise.mappings[scope]
    raise "Could not find mapping for #{scope}" unless mapping
    mapping
  end
end

Deviseのリソースとルーティングをマッピングするクラスのインスタンスが返りました。

mapping.toを実行してみます。

$  @mapping.to
=> User(id: integer, email: string, encrypted_password: string, reset_password_token: string, reset_password_sent_at: datetime, remember_created_at: datetime, created_at: datetime, updated_at: datetime)

Userクラスがcallされています。なので、authenticate_with_samlはUserモデルに対して実行されることになりますね。

def authenticate_with_saml(saml_response, relay_state)
  key = Devise.saml_default_user_key
  decorated_response = ::SamlAuthenticatable::SamlResponse.new(
    saml_response,
    attribute_map(saml_response),
  )
  if Devise.saml_use_subject
    auth_value = saml_response.name_id
  else
    auth_value = decorated_response.attribute_value_by_resource_key(key)
  end
  auth_value.try(:downcase!) if Devise.case_insensitive_keys.include?(key)

  resource = Devise.saml_resource_locator.call(self, decorated_response, auth_value)

  raise "Only one validator configuration can be used at a time" if Devise.saml_resource_validator && Devise.saml_resource_validator_hook
  if Devise.saml_resource_validator || Devise.saml_resource_validator_hook
    valid = if Devise.saml_resource_validator then Devise.saml_resource_validator.new.validate(resource, saml_response)
            else Devise.saml_resource_validator_hook.call(resource, decorated_response, auth_value)
            end
    if !valid
      logger.info("User(#{auth_value}) did not pass custom validation.")
      return nil
    end
  end

  if resource.nil?
    if Devise.saml_create_user
      logger.info("Creating user(#{auth_value}).")
      resource = new
    else
      logger.info("User(#{auth_value}) not found.  Not configured to create the user.")
      return nil
    end
  end

  if Devise.saml_update_user || (resource.new_record? && Devise.saml_create_user)
    Devise.saml_update_resource_hook.call(resource, decorated_response, auth_value)
  end

  resource
end

ここがdevise_saml_authenticatableを使ったSSOのログインの仕組みの肝だと思うのでじーっくり読んでみます。

# デフォルトのユーザーキーを設定します。 ユーザーはこのキーで検索されます。 認証応答に属性が含まれていることを確認してください。
$ key = Devise.saml_default_user_key
=> :email

# SAMLのレスポンスを加工
$ decorated_response = ::SamlAuthenticatable::SamlResponse.new(saml_response, attribute_map(saml_response))

# この値を設定して、電子メールを比較する情報としてSubjectまたはSAMLアサーションを使用できます。 設定しない場合、EメールはSAMLアサーション属性から抽出されます。
$ Devise.saml_use_subject
=> true

$ auth_value = saml_response.name_id
=> "your_idp_id@your_idp_domain"

# 大文字と小文字を区別しない認証キーを構成します。 これらのキーは、ユーザーの作成または変更時、およびユーザーの認証または検索に使用されるときに小文字になります。 デフォルトは:emailです。
$ auth_value.try(:downcase!) if Devise.case_insensitive_keys.include?(key)

$ resource = Devise.saml_resource_locator.call(self, decorated_response, auth_value)
=> #<User id: 1, email: "your_idp_id@your_idp_domain", created_at: "2021-10-17 13:42:43", updated_at: "2021-11-12 13:18:25">

# 取得したリソースと応答を取得直後に取得し、有効な場合はtrueを返す#validateメソッドを実装します。 
# Falseを指定すると、認証が失敗します。 saml_resource_validatorとsaml_resource_validator_hookのいずれか1つのみを使用できます。
# 両方とも Trueだと、「一度に使用できるバリデーター構成は1つだけです」というエラーがraiseします。
$ Devise.saml_resource_validator
=> nil

$ Devise.saml_resource_validator_hook
=> nil

# 自分の環境では両方nilだったためvalidateは省略

$ resource.nil?
=> false

# ログインに成功した後、ユーザーの属性を更新します。 (デフォルトはfalse)
$ Devise.saml_update_user
=> false

$ (resource.new_record? && Devise.saml_create_user)
=> false

一通り追ってみましたが、実際にユーザーを取得しているっぽい処理はDevise.saml_resource_locator.callメソッドだと思われるので、stepでどんな処理をしているか見に行ってみます。

# デフォルトのリソースロケーター。 saml_default_user_keyとauth_valueを使用してユーザーをresolveします。 詳細については、saml_resource_locatorを参照してください。
# /lib/devise_saml_authenticatable.rb:127

mattr_reader :saml_default_resource_locator
@@saml_default_resource_locator = Proc.new do |model, saml_response, auth_value|
  model.where(Devise.saml_default_user_key => auth_value).first
end

$ model
=> User(id: integer, email: string, ...

$ saml_response.class
=> SamlAuthenticatable::SamlResponse

$ auth_value
=> IdP側のemailアドレスが返ります# ユーザーを検索しに行く
$ model.where(Devise.saml_default_user_key => auth_value).first
=> #<User id: 1, email: "idp_mailaddress"

なるほどモデル名に対してwhereメソッドでDevise.saml_default_user_keyに指定した属性をauth_valueで検索しに行く処理でした。

これも余談ですが、where + first は find_by で置き換えられると思うので、細かいですが修正PRを出してもいいかもしれないですね、、、

これで概ね追えたと思います。SamlAuthenticatable::SamlResponseクラスの処理や、attribute-map.yml周りのコードは別の記事で追ってみたいと思います。(もう12000字超えてるし、、、)

Rack::MockRequestとRack::Requestを使ってRack::Requestのbodyのrack.inputをいじっていて気づいたこと

こんにちは!kossyです!


今回はRack::MockRequestのenv_forメソッドとRack::Requestクラスを使って、Rack::Requestのbodyのrack.inputをいじっていて気づいたことがあったので、
備忘録としてブログに残してみたいと思います。


環境

Ruby 2.6.8
Rails 6.0.4
MacOS BigSur


Rack::MockRequestを使ってenvを生成する

rack gemにはデフォルトで Rack::MockRequest というクラスが定義されています。

www.rubydoc.info

github.com

Rack::MockRequestのenv_forメソッドを使えばenvオブジェクトを生成することができるので、まずはこちらを試してみます。

# rails c

$ env = Rack::MockRequest.env_for("/", {})
=> {"rack.version"=>[1, 3],
 "rack.input"=>#<StringIO:0x000055e41ae646b0>,
 "rack.errors"=>#<StringIO:0x000055e41ae64750>,
 "rack.multithread"=>true,
 "rack.multiprocess"=>true,
 "rack.run_once"=>false,
 "REQUEST_METHOD"=>"GET",
 "SERVER_NAME"=>"example.org",
 "SERVER_PORT"=>"80",
 "QUERY_STRING"=>"",
 "PATH_INFO"=>"/",
 "rack.url_scheme"=>"http",
 "HTTPS"=>"off",
 "SCRIPT_NAME"=>"",
 "CONTENT_LENGTH"=>"0"}

envのrack.inputに日本語の文字列を渡してみます。

$ env["rack.input"].string
=> ""

$ env.merge!(::Rack::RACK_INPUT => StringIO.new("その辺にいるWebエンジニアの備忘録"))

$ env["rack.input"].string
=> "その辺にいるWebエンジニアの備忘録"

env["rack.input"]に日本語の文字列を入れることができました。


Rack::Requestのbodyの日本語文字列をreadで読み出してみる

github.com

次に、Rack::Requestインスタンスを生成して、先ほど渡した日本語文字列をreadメソッドで読み出してみます。

$ request = Rack::Request.new(env)

# envで文字列を参照できる
$ request.env['rack.input'].string
=> "その辺にいるWebエンジニアの備忘録"

# bodyはStringIOクラスのインスタンスが格納されている
$ request.body
=> #<StringIO:0x000055e41e96a8b8>

# 4096はバイト数
$ data = request.body.read(4096)
=> "\xE3\x81\x9D\xE3\x81\xAE\xE8\xBE\xBA\xE3\x81\xAB\xE3\x81\x84\xE3\x82\x8BWeb\xE3\x82\xA8\xE3\x83\xB3\xE3\x82\xB8\xE3\x83\x8B\xE3\x82\xA2\xE3\x81\xAE\xE5\x82\x99\xE5\xBF\x98\xE9\x8C\xB2"

非ASCII文字はエスケープされていますね。この文字列をJSON.generateしようとすると以下のエラーが発生します。

$ JSON.generate(data)
=> Encoding::UndefinedConversionError: "\xE3" from ASCII-8BIT to UTF-8

同様の問題がsentry-rubyというGemで発生していたようです。

github.com

修正されたPRでは、非ASCII文字をUTF-8エンコーディングしていました。

$ encoded_data = data.force_encoding(Encoding::UTF_8)
=> "その辺にいるWebエンジニアの備忘録"

rack.inputに非ASCII文字を渡してreadでバイト指定して読み出す時は気をつけるようにしましょう。。。


まとめ

Rack便利!と思う反面きちんと挙動を理解しないと思わぬところでハマってしまうので、

完全にブラックボックスな状態で使うのはやはり怖いと思いました。

Gemのコード読んでおいてよかった、、、

graphql-rubyでCustom Scalarsを定義してみる

こんにちは!kossyです!


今回はgraphql-rubyでCustom Scalarsを定義する方法について、備忘録としてブログに残してみたいと思います。


環境
Ruby 2.6.8
Rails 6.0.4
MacOS BigSur
graphql-ruby 1.12.19


CustomScalarsとは

graphqlにはデフォルトで組み込まれているいくつかのscalar値があります。

String, like a JSON or Ruby string
Int, like a JSON or Ruby integer
Float, like a JSON or Ruby floating point decimal
Boolean, like a JSON or Ruby boolean (true or false)
ID, which a specialized String for representing unique object identifiers
ISO8601DateTime, an ISO 8601-encoded datetime
ISO8601Date, an ISO 8601-encoded date
JSON, ⚠ This returns arbitrary JSON (Ruby hashes, arrays, strings, integers, floats, booleans and nils). Take care: by using this type, you completely lose all GraphQL type safety. Consider building object types for your data instead.
BigInt, a numeric value which may exceed the size of a 32-bit integer

出典: GraphQL - Scalars

上記以外でも、scalarsを開発者が独自に定義することができます。それがCustomScalarsです。

CustomScalarsの定義

CustomScalarsを定義するには、Types::BaseScalarを継承したクラスを作成する必要があります。

module Types
  class PhoneNumber < Types::BaseScalar
    description 'PhoneNumber'

    def self.coerce_input(input_value, _context)
      if input_value.match?(/\A\d{10,11}\z/)
        input_value
      else
        raise GraphQL::CoercionError, "#{input_value.inspect} is not a valid Phone Number."
      end
    end

    def self.coerce_result(ruby_value, context)
      ruby_value.to_s
    end
  end
end

このように定義を行い、

module Types
  class UserInfoInputType < Types::BaseInputObject
    argument :phone_number, Types::PhoneNumber, required: true
  end
end

のようにargument等で指定することによって適用することができます。

graphiql等のGrapQL Clientで試した結果は以下です。

{
  "errors": [
    {
      "message": "Variable $userInfoInput of type UserInfoInputForm! was provided invalid value for userInfo.phoneNumber (\"タイトル\" is not a valid Phone Number.)",
      "locations": [
        {
          "line": 1,
          "column": 39
        }
      ],
      "extensions": {
        "value": {
          "userInfo": {
            "phoneNumber": "タイトル"
          }
        },
        "problems": [
          {
            "path": [
              "userInfo",
            ],
            "explanation": "\"タイトル\" is not a valid Phone Number.",
            "message": "\"タイトル\" is not a valid Phone Number."
          }
        ]
      }
    }
  ]
}

「タイトル」という文字列はInvaildだという例外が得られました。

正しい文字をargumentとして渡した場合を見てみます。

{
  "data": {
    "updateUserInfo": {
      "userInfo": {
        "phoneNumber": "09012345678"
      }
    }
  }
}

例外が起こらずに処理が完了しました。


まとめ

CustomScalarを使えば、プリミティブな型(StringやInt等)を使うよりもより厳密にデータを扱うことができそうです。

punditのpolicy_classで別モデルのPolicyを実行する

こんにちは!kossyです!


環境

Ruby 2.6.8
Rails 6.0.4
MacOS BigSur
pundit 2.1.1


なお、Userモデル、Postモデル、Commentモデルが存在するものとします。

policy_classの使い方

例えば、CommentクラスのインスタンスにPostモデルのPolicyを実行したいケースです。

def show
  @comment = Comment.find(params[:id])

  authorize(@comment, policy_class: PostPolicy)
end

このように記述すると、PostPolicyが実行されるようになります。

class PostPolicy < ApplicationPolicy

  def show?
    user.admin?
  end

end

authorizeメソッドの引数にはsymbolで実行したいPolicyのメソッド名も指定することができます。

# PostPolicyクラスのindex?メソッドを実行する

authorize(@comment, :index?, policy_class: PostPolicy)

authorizeメソッドのコードを追ってみる

ではauthorizeメソッドのコードを追ってみて、どのように上記の挙動を実現しているのか確認してみましょう。

github.com

    # Retrieves the policy for the given record, initializing it with the
    # record and user and finally throwing an error if the user is not
    # authorized to perform the given action.
    #
    # @param user [Object] the user that initiated the action
    # @param record [Object] the object we're checking permissions of
    # @param query [Symbol, String] the predicate method to check on the policy (e.g. `:show?`)
    # @param policy_class [Class] the policy class we want to force use of
    # @raise [NotAuthorizedError] if the given query method returned false
    # @return [Object] Always returns the passed object record
    def authorize(user, record, query, policy_class: nil)
      policy = policy_class ? policy_class.new(user, record) : policy!(user, record)

      raise NotAuthorizedError, query: query, record: record, policy: policy unless policy.public_send(query)

      record.is_a?(Array) ? record.last : record
    end

コメントアウト部分を日本語に訳してみます。

Retrieves the policy for the given record, initializing it with the record and user and finally throwing an error
if the user is not authorized to perform the given action.

指定されたレコードのポリシーを取得し、レコードとユーザーで初期化し、
ユーザーが指定されたアクションの実行を許可されていない場合は、最後にエラーをスローします。

@param user [Object] アクションを開始したユーザー
@param record [Object]パーミッションをチェックしているオブジェクト
@param query [Symbol、String]ポリシーをチェックするためのメソッド(例: show?)
@param policy_class [Class]強制的に使用するポリシークラス

指定されたクエリメソッドがfalseを返した場合は@raise [NotAuthorizedError]

@return [Object]常に渡されたオブジェクトレコードを返します

出典: pundit/pundit.rb at master · varvet/pundit · GitHub

引数と返り値についての記載がありました。

メソッドの中身を見ます。

policy = policy_class ? policy_class.new(user, record) : policy!(user, record)

この部分は、引数のpolicy_classが存在する場合、そのpolicy_classをuserとrecordを引数にしてイニシャライズしています。
policy_classがない場合はpolicy!メソッドを実行していますので、処理を見に行ってみます。

policy!

    # Retrieves the policy for the given record.
    #
    # @see https://github.com/varvet/pundit#policies
    # @param user [Object] the user that initiated the action
    # @param record [Object] the object we're retrieving the policy for
    # @raise [NotDefinedError] if the policy cannot be found
    # @raise [InvalidConstructorError] if the policy constructor called incorrectly
    # @return [Object] instance of policy class with query methods
    def policy!(user, record)
      policy = PolicyFinder.new(record).policy!
      policy.new(user, pundit_model(record))
    rescue ArgumentError
      raise InvalidConstructorError, "Invalid #<#{policy}> constructor is called"
    end

コメントアウト部分を日本語に訳してみます。

Retrieves the policy for the given record.

指定されたレコードのポリシーを取得します。

@param user [Object] アクションを開始したユーザー
@param record [Object]ポリシーを取得するオブジェクト
ポリシーが見つからない場合は@raise [NotDefinedError]
ポリシーコンストラクターが誤って呼び出された場合は@raise [InvalidConstructorError]
@return [Object]クエリメソッドを使用したポリシークラスのインスタンス

出典: pundit/pundit.rb at master · varvet/pundit · GitHub

引数と返り値、例外が発生する条件について記載がありました。

処理を見てみます。

policy = PolicyFinder.new(record).policy!
policy.new(user, pundit_model(record))

PolicyFinderインスタンスのpolicy!メソッドを見る必要がありそう。


def initialize(object)
  @object = object
end

# @return [Class] policy class with query methods
# @raise [NotDefinedError] if policy could not be determined
#
def policy!
  policy or raise NotDefinedError, "unable to find policy `#{find(object)}` for `#{object.inspect}`"
end

def policy
  klass = find(object)
  klass.is_a?(String) ? klass.safe_constantize : klass
end

def find(subject)
  if subject.is_a?(Array)
    modules = subject.dup
    last = modules.pop
    context = modules.map { |x| find_class_name(x) }.join("::")
    [context, find(last)].join("::")
  elsif subject.respond_to?(:policy_class)
    subject.policy_class
  elsif subject.class.respond_to?(:policy_class)
    subject.class.policy_class
  else
    klass = find_class_name(subject)
    "#{klass}#{SUFFIX}"
  end
end

def find_class_name(subject)
  if subject.respond_to?(:model_name)
    subject.model_name
  elsif subject.class.respond_to?(:model_name)
    subject.class.model_name
  elsif subject.is_a?(Class)
    subject
  elsif subject.is_a?(Symbol)
    subject.to_s.camelize
  else
    subject.class
  end
end

findメソッドかfind_class_nameメソッドでPolicyを実行するクラスを返して、返されたモデル名がString型ならsafe_constantizeメソッドでクラスとして扱えるようにし、
String型でなければPolicyを実行するクラスをそのまま返却しています。

つまり、PolicyFinderクラスのインスタンスメソッドであるpolicy!メソッドの返り値はPolicyを実行するクラスが返ることになります。

だいぶコードを追ったので改めてPunditモジュールのpolicy!メソッドの処理を見ます。

def policy!(user, record)
  policy = PolicyFinder.new(record).policy!
  policy.new(user, pundit_model(record))
rescue ArgumentError
  raise InvalidConstructorError, "Invalid #<#{policy}> constructor is called"
end

引数に誤りがあれば例外を投げて、とくに誤りがなければPolicyFinderインスタンスのpolicy!メソッドで見つけたクラスをnewして返却しています。


ようやくauthorizeメソッドに返ってくることができます、、、

def authorize(user, record, query, policy_class: nil)
  policy = policy_class ? policy_class.new(user, record) : policy!(user, record)

  raise NotAuthorizedError, query: query, record: record, policy: policy unless policy.public_send(query)

  record.is_a?(Array) ? record.last : record
end

引数のpolicy_classが存在する場合、そのpolicy_classをuserとrecordを引数にしてイニシャライズしています。
policy_classが渡されていない場合は、recordのクラスのPolicyインスタンスを返却しています。

public_sendの返り値がnilまたはfalseの場合はNotAuthorizedErrorをthrowしています。

recordが配列ならrecordの最後のインスタンスを、配列でなければrecordをそのまま返します。

余談

authorizeの返り値がobjectなので、

@post = authorize Post.find(params[:id])

のような使い方ができるんですね。

github.com


感想

policy_classを用いればかなり柔軟にPolicyを実行することができるので、エッジケースに対応できそうです。


大いに参考にさせていただいた記事

素晴らしいコンテンツの提供誠にありがとうございます。

pundit/README.md at master · varvet/pundit · GitHub

SAMLでのSSOを実現するGem「ruby-saml」のソースコードを追ってみる(Metadata編)

こんにちは!kossyです!


今回は、SAMLでのSSOを実現するGem「ruby-saml」のソースコードを追ってみた(SamlResponseだけ)ので、
備忘録としてブログに残してみたいと思います。


環境
Ruby 2.6.8
Rails 6.0.4.1
MacOS Catalina


なお、IdPにはLINE WORKSを用いていると仮定してコードリーディングしてみます。

そして、リーディング元のレポジトリは拙著で作成したアプリケーションとします。

kossy-web-engineer.hatenablog.com


metadataとは?

そもそもmetadataとはなんでしょうか。

SAML メタデータ・ファイルには、 SAML 2.0 プロトコル・メッセージ交換で使用できるさまざまな SAML 権限に関する情報が含まれています。
このメタデータは、 ID プロバイダー・エンドポイントと証明書を識別し、 SAML 2.0 メッセージ交換を保護します。

出典: SAML 2.0 メタデータ・ファイルの定義

SAMLパーティ間で設定情報を表現および共有するXMLスキーマを定義
SPがIdPを利用するための情報を記述して、IdPとSPの信頼関係を構築できる。
・エンティティのサポートされているSAMLバインディング
・運用上の役割(IDP、SPなど)
・識別子情報、サポートID属性
・および暗号化と署名のための鍵情報

出典: SAMLの仕様を読む。 - マイクロソフト系技術情報 Wiki

SAML認証では基本的にIdPにServiceProviderの情報を登録する必要があるのですが、この登録時にmetadata(= SP Issuer、EntityIDとも)を取得するエンドポイントを登録します。

LINE WORKSの場合だと以下の画像のように登録します。

f:id:kossy-web-engineer:20211031082809p:plain

より詳しいMetadataの仕様について拙著では解説しませんので、興味のある方は以下のPDFを参考にしてみてください。

https://docs.oasis-open.org/security/saml/v2.0/saml-metadata-2.0-os.pdf

metadataアクション

コードリーディングに移ります。

def metadata
  settings = Account.get_saml_settings(get_url_base)
  meta = OneLogin::RubySaml::Metadata.new
  render :xml => meta.generate(settings, true)
end

metadataアクション自体は3行のコードです。

まずはOneLogin::RubySaml::Metadataのinitializeメソッドを見に行ってみます。と思ったらinitializeメソッドが定義されてなかった、、、

なので、generateメソッドを読んでみます。


OneLogin::RubySaml::Metadata#generate

def generate(settings, pretty_print=false, valid_until=nil, cache_duration=nil)
  meta_doc = XMLSecurity::Document.new
  add_xml_declaration(meta_doc)
  root = add_root_element(meta_doc, settings, valid_until, cache_duration)
  sp_sso = add_sp_sso_element(root, settings)
  add_sp_certificates(sp_sso, settings)
  add_sp_service_elements(sp_sso, settings)
  add_extras(root, settings)
  embed_signature(meta_doc, settings)
  output_xml(meta_doc, pretty_print)
end

最終的な返り値はXMLかと思われますが、いろいろなメソッドが呼ばれてますので、一つ一つ見ていきます。


add_xml_declaration(meta_doc)

def add_xml_declaration(meta_doc)
  meta_doc << REXML::XMLDecl.new('1.0', 'UTF-8')
end

引数のmeta_docにXMLDeclarationを追加するメソッドでした。

# rails c

$ meta_doc = XMLSecurity::Document.new

$ meta_doc << REXML::XMLDecl.new('1.0', 'UTF-8')
=>  <UNDEFINED> ... </>

www.weblio.jp


add_root_element

def add_root_element(meta_doc, settings, valid_until, cache_duration)
  namespaces = {
      "xmlns:md" => "urn:oasis:names:tc:SAML:2.0:metadata"
  }

  if settings.attribute_consuming_service.configured?
    namespaces["xmlns:saml"] = "urn:oasis:names:tc:SAML:2.0:assertion"
  end

  root = meta_doc.add_element("md:EntityDescriptor", namespaces)
  root.attributes["ID"] = OneLogin::RubySaml::Utils.uuid
  root.attributes["entityID"] = settings.sp_entity_id if settings.sp_entity_id
  root.attributes["validUntil"] = valid_until.strftime('%Y-%m-%dT%H:%M:%S%z') if valid_until
  root.attributes["cacheDuration"] = "PT" + cache_duration.to_s + "S" if cache_duration
  root
end

SAMLに必要なRootElementを付与するメソッドでした。


add_sp_sso_element

def add_sp_sso_element(root, settings)
  root.add_element "md:SPSSODescriptor", {
      "protocolSupportEnumeration" => "urn:oasis:names:tc:SAML:2.0:protocol",
      "AuthnRequestsSigned" => settings.security[:authn_requests_signed],
      "WantAssertionsSigned" => settings.security[:want_assertions_signed],
  }
end

SPSSODescriptorの説明については以下ブログが参考になりました。

blog.cybozu.io


AuthnRequestsSignedについては以下の記事が参考になりました。

AuthnRequestsSigned

このサービス・プロバイダーによって送信される <samlp:AuthnRequest> メッセージに署名するかどうかを指定します。

出典: SAML Web SSO 2.0 認証 (samlWebSso20)

この変更が最初に加わったのはこのPRのようです。(当初はDefaultでfalseで外部からカスタマイズができない設定だったんですね。)

github.com


wantAssertionsSignedについては以下の記述。

wantAssertionsSigned

このサービス・プロバイダーが受信する <saml:Assertion> エレメントが、アサーションに署名する Signature エレメントを含む必要があるかを指定します。

出典: SAML Web SSO 2.0 認証 (samlWebSso20)

add_sp_certificates

# Add KeyDescriptor if messages will be signed / encrypted
# with SP certificate, and new SP certificate if any

# メッセージがSP証明書で署名/暗号化される場合はKeyDescriptorを追加し、
# 存在する場合は新しいSP証明書を追加します

def add_sp_certificates(sp_sso, settings)
  cert = settings.get_sp_cert
  cert_new = settings.get_sp_cert_new

  for sp_cert in [cert, cert_new]
    if sp_cert
      cert_text = Base64.encode64(sp_cert.to_der).gsub("\n", '')
      kd = sp_sso.add_element "md:KeyDescriptor", { "use" => "signing" }
      ki = kd.add_element "ds:KeyInfo", {"xmlns:ds" => "http://www.w3.org/2000/09/xmldsig#"}
      xd = ki.add_element "ds:X509Data"
      xc = xd.add_element "ds:X509Certificate"
      xc.text = cert_text

      if settings.security[:want_assertions_encrypted]
        kd2 = sp_sso.add_element "md:KeyDescriptor", { "use" => "encryption" }
        ki2 = kd2.add_element "ds:KeyInfo", {"xmlns:ds" => "http://www.w3.org/2000/09/xmldsig#"}
        xd2 = ki2.add_element "ds:X509Data"
        xc2 = xd2.add_element "ds:X509Certificate"
        xc2.text = cert_text
      end
    end
  end

  sp_sso
end

正直なんのこっちゃなのでコンソールで実行してみます。

$ cert = settings.get_sp_cert
=> nil

$ cert_new = settings.get_sp_cert_new
=> nil

$   for sp_cert in [cert, cert_new]
    if sp_cert
      cert_text = Base64.encode64(sp_cert.to_der).gsub("\n", '')
      kd = sp_sso.add_element "md:KeyDescriptor", { "use" => "signing" }
      ki = kd.add_element "ds:KeyInfo", {"xmlns:ds" => "http://www.w3.org/2000/09/xmldsig#"}
      xd = ki.add_element "ds:X509Data"
      xc = xd.add_element "ds:X509Certificate"
      xc.text = cert_text

      if settings.security[:want_assertions_encrypted]
        kd2 = sp_sso.add_element "md:KeyDescriptor", { "use" => "encryption" }
        ki2 = kd2.add_element "ds:KeyInfo", {"xmlns:ds" => "http://www.w3.org/2000/09/xmldsig#"}
        xd2 = ki2.add_element "ds:X509Data"
        xc2 = xd2.add_element "ds:X509Certificate"
        xc2.text = cert_text
      end
    end
  end

=> [nil, nil]

私の環境ではcertもcert_newもnilでした。

理由はsettingsオブジェクトのcertificate属性に値を入れていないからでした。


add_sp_service_elements

def add_sp_service_elements(sp_sso, settings)
  if settings.single_logout_service_url
    sp_sso.add_element "md:SingleLogoutService", {
        "Binding" => settings.single_logout_service_binding,
        "Location" => settings.single_logout_service_url,
        "ResponseLocation" => settings.single_logout_service_url
    }
  end

  if settings.name_identifier_format
    nameid = sp_sso.add_element "md:NameIDFormat"
    nameid.text = settings.name_identifier_format
  end

  if settings.assertion_consumer_service_url
    sp_sso.add_element "md:AssertionConsumerService", {
        "Binding" => settings.assertion_consumer_service_binding,
        "Location" => settings.assertion_consumer_service_url,
        "isDefault" => true,
        "index" => 0
    }
  end

  if settings.attribute_consuming_service.configured?
    sp_acs = sp_sso.add_element "md:AttributeConsumingService", {
      "isDefault" => "true",
      "index" => settings.attribute_consuming_service.index
    }
    srv_name = sp_acs.add_element "md:ServiceName", {
      "xml:lang" => "en"
    }
    srv_name.text = settings.attribute_consuming_service.name
    settings.attribute_consuming_service.attributes.each do |attribute|
      sp_req_attr = sp_acs.add_element "md:RequestedAttribute", {
        "NameFormat" => attribute[:name_format],
        "Name" => attribute[:name],
        "FriendlyName" => attribute[:friendly_name],
        "isRequired" => attribute[:is_required] || false
      }
      unless attribute[:attribute_value].nil?
        Array(attribute[:attribute_value]).each do |value|
          sp_attr_val = sp_req_attr.add_element "saml:AttributeValue"
          sp_attr_val.text = value.to_s
        end
      end
    end
  end

  # With OpenSSO, it might be required to also include
  #  <md:RoleDescriptor xmlns:xsi="http://www.w3.org/2001/XMLSchema-instance" xmlns:query="urn:oasis:names:tc:SAML:metadata:ext:query" xsi:type="query:AttributeQueryDescriptorType" protocolSupportEnumeration="urn:oasis:names:tc:SAML:2.0:protocol"/>
  #  <md:XACMLAuthzDecisionQueryDescriptor WantAssertionsSigned="false" protocolSupportEnumeration="urn:oasis:names:tc:SAML:2.0:protocol"/>

  sp_sso
end

ServiceProviderの情報をXMLに適宜追加するメソッドですね。


add_extras

# can be overridden in subclass
def add_extras(root, _settings)
  root
end

サブクラスでオーバーライドできるとのことでした。

このメソッドが加わったのは以下のPRです。

github.com

Conversationを見ると独自で追加したいメタデータを定義する用途で使うメソッドっぽいです。


embed_signature

def embed_signature(meta_doc, settings)
  return unless settings.security[:metadata_signed]

  private_key = settings.get_sp_key
  cert = settings.get_sp_cert
  return unless private_key && cert

  meta_doc.sign_document(private_key, cert, settings.security[:signature_method], settings.security[:digest_method])
end


XMLに署名を埋め込むメソッドですね。こちらはmetadata_signed属性やsp_key、certificate等がないと処理がスキップされるみたいです。


最後のoutput_xmlは引数を元にXMLを出力するメソッドでした。


まとめ

metadataの仕様が分からなさすぎて、ただ処理を追うだけになってしまい「なんでこの処理が必要なのか」までは理解ができませんでした。。。

次はmetadataの仕様を自分なりに調べてまとめた記事になりそう、、、


大いに参考にさせていただいたサイト

素晴らしいコンテンツの提供、誠にありがとうございます。

SAML認証ができるまで - Cybozu Inside Out | サイボウズエンジニアのブログ
SAML Web SSO 2.0 認証 (samlWebSso20)