複数のフラグを1つのカラムで管理できるGem「flag_shih_tzu」の使い方とユースケース
こんにちは!kossyです!
今回は、複数のフラグを1つのカラムで管理できるGem「flag_shih_tzu」の使い方とユースケースについて、
備忘録としてブログに残してみたいと思います。
環境
flag_shih_tzu とは
Booleanを含んだ配列を、一つの整数として格納できるActiveRecordのエクステンションです。MySQL, PostgreSQL、SQLite等、DBを問わず動作します。
使い方は簡単で、has_flagメソッドに、管理したいフラグ名を数値と共に渡すだけで実現できます。
ちなみに、「shih_tzu」の由来は犬の品種の一つである、「シーズー」から命名したらしいです。
使い方
まずはApplicationRecordを継承したモデルに FlagShihTzu モジュールをincludeします。
class Admin < ActiveRecord::Base
  include FlagShihTzu
end
次に、フラグを格納するカラムを作成するマイグレーションファイルを用意します。
  def change
    add_column :admins, :function_flags, :integer, default: 0, null: false, comment: '機能利用フラグ'
  end
次に、has_flagメソッドに数値と管理したいフラグ名をシンボルで渡します。
columnにカラム名を渡せば、渡したカラムでフラグを管理することができます。
class Admin < ActiveRecord::Base
  include FlagShihTzu

  has_flag(
    1 => :use_announcement,
    2 => :use_term_of_service_version,
    3 => :use_privacy_policy,
    :column => 'function_flags'
  )
end
これで準備完了です。
各種メソッド
上記の定義を行った場合、以下のインスタンスメソッドが定義されます。
Admin#all_features # [:use_announcement, :use_term_of_service_version, :use_privacy_policy]
Admin#selected_features
Admin#select_all_features
Admin#unselect_all_features
Admin#selected_features=

Admin#use_announcement
Admin#use_announcement?
Admin#use_announcement=
Admin#not_use_announcement
Admin#not_use_announcement?
Admin#not_use_announcement=
Admin#use_announcement_changed?
Admin#has_use_announcement?

Admin#use_term_of_service_version
Admin#use_term_of_service_version?
Admin#use_term_of_service_version=
Admin#not_use_term_of_service_version
Admin#not_use_term_of_service_version?
Admin#not_use_term_of_service_version=
Admin#use_term_of_service_version_changed?
Admin#has_use_term_of_service_version?

Admin#use_privacy_policy
Admin#use_privacy_policy?
Admin#use_privacy_policy=
Admin#not_use_privacy_policy
Admin#not_use_privacy_policy?
Admin#not_use_privacy_policy=
Admin#use_privacy_policy_changed?
Admin#use_privacy_policy?
また、以下のクラスメソッドも定義されます。
Admin.use_announcement         # :conditions => "(admins.function_flags in (1,3,5,7))"
Admin.not_use_announcement     # :conditions => "(admins.function_flags not in (1,3,5,7))"
Admin.use_term_of_service_version           # :conditions => "(admins.function_flags in (2,3,6,7))"
Admin.not_use_term_of_service_version       # :conditions => "(admins.function_flags not in (2,3,6,7))"
Admin.use_privacy_policy      # :conditions => "(admins.function_flags in (4,5,6,7))"
Admin.not_use_privacy_policy  # :conditions => "(admins.function_flags not in (4,5,6,7))"
他にも、callbackメソッドやフラグをupdateするメソッドも定義されますので、
より詳しく知りたい方はReadMeをご覧ください。
ユースケース
複数のフラグを1つのカラムで管理したくなる時がいつか?という観点で考えてみました。
1. 機能利用フラグを管理したい時
例えば管理者権限があるとして、管理者の中でも権限を弱くしたい、といったビジネス要求は往々にしてあります。
そういった際に機能ごとに使用権限を管理することになることが多いと思いますが、機能ごとにフラグのカラムを用意していくと、
機能が追加されるたびにフラグのカラムを追加することになり、管理コストが増します。
そういったケースで、このGemが役に立つのではないでしょうか。
他にもあると思うので随時更新します。
おわりに
実際に開発中のプロダクトでも、際限なく機能利用フラグが増えていっているので、すぐにでも導入したいと思いました。
既にたくさんのフラグが生えているテーブルからの移行については知見がまだないので、そういったケースでどう移行を実現するのか?は需要がありそうな気がしています。
外来診療管理システムのデータモデルを考えてみた
こんにちは!kossyです。
今回は、外来診療管理システムのデータモデルの例が掲載されている書籍がありまして、そちらの内容を自分なりに咀嚼してRDBMSに落とし込んでみたので、備忘録としてブログに残してみたいと思います。
WIPですので随時更新します。
登場人物
- 患者
- 医師
- システム管理者
ユーザーストーリー
患者
DB設計
テーブルは全てid、created_at、updated_atカラムが定義されているものとします。
patients
患者テーブル
| name | type | options | description |
|---|---|---|---|
| number | string | null: false | 患者番号 |
| born_on | date | null: false | 生年月日 |
| sex | integer | null: false | 性別 |
| job_id | bigint | foreign_key: true, index: true, optional: true | 職業(外部キー) |
jobs
職業テーブル
| name | type | options | description |
|---|---|---|---|
| name | string | null: false, index: true | 職業名 |
insurance_cards
保険証テーブル
| name | type | options | description |
|---|---|---|---|
| symbol | string | null: false | 記号 |
| number | string | null: false | 番号 |
| delivery_on | date | null: false | 交付日 |
| acquisition_on | date | 資格取得日 | |
| relationship | integer | null: false | 続柄 |
| expires_on | date | 有効期限 | |
| insurer_number | string | null: false, 6桁or8桁 | 保険者番号 |
備考
- 被用者保険か国民健康保険かで記載してある項目にバラつきがあり、必ずnullになることもあるが、許容する
departments
診療科テーブル
| name | type | options | description |
|---|---|---|---|
| name | string | null: false | 診療科名 |
doctors
医師テーブル
| name | type | options | description |
|---|---|---|---|
| last_name | string | null: false | 姓 |
| first_name | string | null: false | 名 |
| last_name_kana | string | null: false | 姓(カナ) |
| first_name_kana | string | null: false | 名(カナ) |
doctor_departments
医師と診療科の中間テーブル
| name | type | options | description |
|---|---|---|---|
| doctor_id | bigint | null: false, index: true, foreign_key: true | 外部キー |
| department_id | bigint | null: false, index: true, foreign_key: true | 外部キー |
consultations
受診履歴テーブル
| name | type | options | description |
|---|---|---|---|
| patient_id | bigint | null: false, index: true, foreign_key: true | 外部キー |
| doctor_id | bigint | null: false, index: true, foreign_key: true | 外部キー |
| visited_on | date | null: false | 受診日 |
| self_pay_ratio | integer | null: false | 自己負担割合 |
| chief_complaint | text | null: false | 主訴 |
| findings | text | null: false | 所見 |
| visit_category | integer | null: false | 受診区分。初診または再診 |
| status | integer | null: false | 受診状況 |
medical_histories
既往歴テーブル
| name | type | options | description |
|---|---|---|---|
| patient_id | bigint | null: false, index: true, foreign_key: true | 外部キー |
| age | integer | null: false | 罹患時年齢 |
| name | string | 傷病名 | |
| descriptions | text | 摘要 |
consultation_schedules
診察日程テーブル
| name | type | options | description |
|---|---|---|---|
| department_id | bigint | null: false, index: true, foreign_key: true | 外部キー |
| schedule_on | date | null: false, index: true | 診察日 |
| time_category | integer | null: false | 午前/午後区分 |
| patient_count | integer | null: false, default: 0 | 診察患者数 |
| max_wait_patient_count | integer | null: false, default: 0 | 最大待ち患者数 |
doctor_schedules
医師日程テーブル
| name | type | options | description |
|---|---|---|---|
| doctor_id | bigint | null: false, index: true, foreign_key: true | 外部キー |
| consultation_schedule_id | bigint | null: false, index: true, foreign_key: true | 外部キー |
| patient_count | integer | null: false, default: 0 | 診察患者数 |
business_times
診察受付日時テーブル
| name | type | options | description |
|---|---|---|---|
| am_start_at | datetime | null: false | 午前診察開始日時 |
| am_start_at | datetime | null: false | 午前診察終了日時 |
| pm_start_at | datetime | null: false | 午後診察開始日時 |
| pm_start_at | datetime | null: false | 午後診察終了日時 |
sy_masters
傷病マスターテーブル
| name | type | options | description |
|---|---|---|---|
| code | string | null: false, index: true | 傷病コード |
| name | string | null: false, index: true | 傷病名 |
consultation_sy_details
傷病明細テーブル
| name | type | options | description |
|---|---|---|---|
| code | string | null: false, index: true | 傷病コード |
| consultation_id | bigint | null: false, index: true, foreign_key: true | 外部キー |
| outcome_category | integer | null: false | 転帰区分 |
| is_main_disease | boolean | null: false, default: false | 主傷病フラグ |
treatment_masters
処置マスターテーブル
| name | type | options | description |
|---|---|---|---|
| code | string | null: false | 処置コード |
| name | string | null: false | 処置名 |
| category | integer | null: false | 処置区分(処置/注射/点滴) |
treatment_details
処置明細テーブル
| name | type | options | description |
|---|---|---|---|
| code | string | null: false | 処置コード |
| consultation_id | bigint | null: false, index: true, foreign_key: true | 外部キー |
| descriptions | text | null: false | 摘要 |
medicine_masters
薬品マスターテーブル
| name | type | options | description |
|---|---|---|---|
| code | string | null: false | 薬品コード |
| name | string | null: false | 薬品名 |
| unit | string | null: false | 単位 |
consultation_medicine_details
投薬明細テーブル
| name | type | options | description |
|---|---|---|---|
| code | string | null: false | 薬品コード |
| dosing | string | null: false | 服用方法 |
| per_time | integer | null: false | 1回あたり服用量 |
| doses | integer | null: false | 服用回数 |
| way | string | null: false | 投薬方法 |
Time-based One-Time Passwordの仕組みを提供するGem「rotp」をサクッと試して内部実装を把握する
こんにちは!kossyです!
今回はTime-based One-Time Passwordの仕組みを提供するGem「rotp」をサクッと試して内部実装を把握してみたので、ブログに残してみたいと思います。
環境
Ruby 2.6.6
Rails 6.0.3
MacOS catalina
rotp 6.2.0
まずはコンソールでサクッと試す
何はともあれGemfileの編集とbundle install。
#  Gemfile

gem 'rotp'
your_app $ bundle
インストールが終了したらReadMeを見ながらコンソールで試してみます。
$ totp = ROTP::TOTP.new("kossywebengineer", issuer: "Test Service")

$ totp.now
=> 388204

$ totp.verify('388204')
=> 1622295690

# 30秒後に再度実行

$ totp.verify('388204')
=> nil

# 前回実行時から6桁の認証コードが変わっている

$ totp.now
=> 197355
30秒で認証コードが更新されていることがわかります。
verifyメソッドを実行してnilが返った場合は、ワンタイムパスワードが間違っていて認証に失敗したことを表していると思われます。
ちなみにQRコードを生成したい場合は、provisioning_uriメソッドを使います。
$ uri = totp.provisioning_uri('kossywebengineer@example.com')
=> "otpauth://totp/Test%20Service:kossywebengineer%40example.com?secret=kossy-web-engineer&issuer=Test%20Service
生成したQRコードをスマホの GoogleAuthenticator 等のアプリで読み取ります。
GoogleAuthenticatorに6桁の認証コードが表示されますので、そのコードをvefiryメソッドに渡してみます。
$ totp.verify('651353')
=> 1622295720
認証に成功しました。
サクッと実行して挙動を確認してみましたが、rotpでは認証の部分のみの実装のため、もしWebアプリ内で2要素認証を組み込むとなると、
「QRコードの生成」
「2要素認証を有効にしているかどうか」
「secret_keyの管理(newの引数に渡す認証keyです)」
「そのsecret_keyは有効になっているものかどうか」
等を管理する必要があります。上記(QRコードの生成は別ですが)をよしなに行ってくれているのが、devise_two_factorというGemになります。
rotpの内部実装を追ってみる
ここからはrotpの内部実装をソースコードを実行しながら追ってみたいと思います。
ROTP::TOTP.new
initializeメソッドから見ていきます。
module ROTP
  DEFAULT_INTERVAL = 30
  class TOTP < OTP
    attr_reader :interval, :issuer

    # @option options [Integer] interval (30) the time interval in seconds for OTP
    #     This defaults to 30 which is standard.
    def initialize(s, options = {})
      @interval = options[:interval] || DEFAULT_INTERVAL
      @issuer = options[:issuer]
      super
    end

  # 省略
end
引数で渡されたintervalとissuerをインスタンス変数として定義し、superクラス(OTPクラス)のinitializeを呼び出す実装になっていました。
コンソールで試してみます。
$ totp = ROTP::TOTP.new("kossywebengineer", interval: 15, issuer: "Test Service")
=> #<ROTP::TOTP:0x000056128fa78698
 @digest="sha1",
 @digits=6,
 @interval=15,
 @issuer="Test Service",
 @secret="kossy-web-engineer">

$ totp.now
=> 086478

# 15秒後に再度実行。認証コードが変わっている

$ totp.now
=> 800896
インターバルを15秒に設定したので、15秒で認証コードが更新されています。
OTPクラスのinitializeメソッドも見てみましょう。
module ROTP
  class OTP
    attr_reader :secret, :digits, :digest
    DEFAULT_DIGITS = 6

    # @param [String] secret in the form of base32
    # @option options digits [Integer] (6)
    #     Number of integers in the OTP.
    #     Google Authenticate only supports 6 currently
    # @option options digest [String] (sha1)
    #     Digest used in the HMAC.
    #     Google Authenticate only supports 'sha1' currently
    # @returns [OTP] OTP instantiation
    def initialize(s, options = {})
      @digits = options[:digits] || DEFAULT_DIGITS
      @digest = options[:digest] || 'sha1'
      @secret = s
    end
end
デフォルトのdigits(認証コードの桁数)は「6」で、ハッシュ関数は「sha1」となっています。
こちらもコンソールで試してみましょう。
$ totp = ROTP::TOTP.new("kossywebengineer", digits: 8, issuer: "Test Service")
=>  #<ROTP::TOTP:0x000056128a41b228
 @digest="sha1",
 @digits=8,
 @interval=30,
 @issuer="Test Service",
 @secret="kossywebengineer">

$ totp.now
=> "95928414"

$ totp = ROTP::TOTP.new("kossywebengineer", digest: 'md5', issuer: "Test Service")
=> #<ROTP::TOTP:0x000056128d676b78
 @digest="md5",
 @digits=6,
 @interval=30,
 @issuer="Test Service",
 @secret="kossywebengineer">

# サポートされていないdigestを指定するとnow実行時に例外が上がる
$ ROTP::TOTP.new("kossywebengineer", digest: 'sha0', issuer: "Test Service").now
=> RuntimeError: Unsupported digest algorithm (sha0).: first num too large

$ ROTP::TOTP.new("kossywebengineer", digest: 'sha128', issuer: "Test Service").now
=> RuntimeError: Unsupported digest algorithm (sha128).: first num too large
認証アプリにGoogleAuthenticatorを用いた場合、サポートしている桁数が6桁なので、8桁のdigitsには対応していないので注意が必要とのこと。(2021年5月時点)
同様にdigestも「sha1」のみのサポートとのこと。
残りの処理はsecret_keyのインスタンス変数化処理でした。
initializeメソッドも一通り把握できたので、次はnowメソッドを見てみます。
ROTP::TOTP#now
# Generate the current time OTP
# @return [Integer] the OTP as an integer
def now
  generate_otp(timecode(Time.now))
end

# generate_otpメソッドはROTP::OTPクラスに定義されています。

# @param [Integer] input the number used seed the HMAC
# @option padded [Boolean] (false) Output the otp as a 0 padded string
# Usually either the counter, or the computed integer
# based on the Unix timestamp
def generate_otp(input)
  hmac = OpenSSL::HMAC.digest(
    OpenSSL::Digest.new(digest),
    byte_secret,
    int_to_bytestring(input)
  )

  offset = hmac[-1].ord & 0xf
  code = (hmac[offset].ord & 0x7f) << 24 |
          (hmac[offset + 1].ord & 0xff) << 16 |
          (hmac[offset + 2].ord & 0xff) << 8 |
          (hmac[offset + 3].ord & 0xff)
  (code % 10**digits).to_s.rjust(digits, '0')
end
generate_otpに渡しているtimecodeメソッドを見てみます。
def timecode(time)
  timeint(time) / interval # intervalはinitialize時にセットされた値です。デフォルトはintで「30」
end

# Ensure UTC int
def timeint(time)
  return time.to_i unless time.class == Time

  time.utc.to_i
end
引数がTimeクラスの値でなければ引数をto_iしたものを返却して、そうでない場合は.utc.to_iした値を返却していました。
返却された値を、initialize時に設定したintervalの値で割った値を返却するメソッドでした。
generate_otpの処理は、引数の数値とdigits、secret_keyをBase32でdecodeした値を元に、ワンタイムパスワードを生成しています。このワンタイムパスワードがnowメソッドの返り値となります。
次にverifyメソッドを見てみます。
ROTP::TOTP#verify
# Verifies the OTP passed in against the current time OTP
# and adjacent intervals up to +drift+.  Excludes OTPs
# from `after` and earlier.  Returns time value of
# matching OTP code for use in subsequent call.
# @param otp [String] the one time password to verify
# @param drift_behind [Integer] how many seconds to look back
# @param drift_ahead [Integer] how many seconds to look ahead
# @param after [Integer] prevent token reuse, last login timestamp
# @param at [Time] time at which to generate and verify a particular
#   otp. default Time.now
# @return [Integer, nil] the last successful timestamp
#   interval
def verify(otp, drift_ahead: 0, drift_behind: 0, after: nil, at: Time.now)
  timecodes = get_timecodes(at, drift_behind, drift_ahead)

  timecodes = timecodes.select { |t| t > timecode(after) } if after

  result = nil
  timecodes.each do |t|
    result = t * interval if super(otp, generate_otp(t))
  end
  result
end
コメントアウト部分を訳してみます。
渡された OTP を、現在時刻の OTP および +drift+ までの隣接する間隔に対して検証します。 「後」以前の OTP を除外します。
後続の呼び出しで使用するために、一致する OTP コードの時間値を返します。@param otp [String] 検証するワンタイムパスワード
@param drift_behind [Integer] 遡って何秒か
@param drift_ahead [Integer] 先読みする秒数
@param after [Integer] は、トークンの再利用、最終ログインのタイムスタンプを防止します
@param at [Time] 特定の
driftは認証コードが有効な期間を設定できるものです。例えばSMSで認証コードを伝える場合、デフォルトの30秒のままだと受け取ってからすぐに認証期限が切れてしまいますが、
driftの設定を長めに設定することで、この問題を回避することができます。
Google翻訳なので一部日本語がおかしいところもありますが、概ね内容は理解できました。
まずはget_timecodesメソッドから読んでみます。
# Get back an array of timecodes for a period
def get_timecodes(at, drift_behind, drift_ahead)
  now = timeint(at)
  timecode_start = timecode(now - drift_behind)
  timecode_end = timecode(now + drift_ahead)
  (timecode_start..timecode_end).step(1).to_a
end
先ほど読んだtimeintメソッドとtimecodeメソッドを使いながら、引数のdrift値を使ってRangeオブジェクトから配列を生成して返却するメソッドになっています。
返り値は以下のような値になります。
=> [54078254, 54078255, 54078256, 54078257, 54078258, ...]
このtimecodesを引数のafterが渡されていれば、afterで指定された秒数で計算したtimecodeよりも数値が大きいものをselectして、新たなtimecodesを生成しています。
読み進めるとsuperメソッドでOTPクラスのverifyが呼ばれているので、こちらも読んでみます。
def verify(input, generated)
  raise ArgumentError, '`otp` should be a String' unless
      input.is_a?(String)

  time_constant_compare(input, generated)
end

# constant-time compare the strings
def time_constant_compare(a, b)
  return false if a.empty? || b.empty? || a.bytesize != b.bytesize

  l = a.unpack "C#{a.bytesize}"
  res = 0
  b.each_byte { |byte| res |= byte ^ l.shift }
  res == 0
end
こちらもコンソールで試してみます。
$ totp = ROTP::TOTP.new("kossywebengineer", issuer: "Test Service")

$ a, b = [totp.now] * 2 # 今回のコードは435752です

$ a.empty? || b.empty? || a.bytesize != b.bytesize
=> false

$ l = a.unpack "C#{a.bytesize}" # a.bytesizeの返り値は6です
=> [52, 51, 53, 55, 53, 50]

$ b.each_byte { |byte| res |= byte ^ l.shift }
=> "435752"

$ res
=> 0

# ここからeach_bytesの挙動の確認
$ l = a.unpack "C#{a.bytesize}"

$ res |= b.bytes[0] ^ l.shift
=> 0
$ res |= b.bytes[1] ^ l.shift
=> 0
$  res |= b.bytes[2] ^ l.shift
=> 0
$  res |= b.bytes[3] ^ l.shift
=> 0
$  res |= b.bytes[4] ^ l.shift
=> 0
$  res |= b.bytes[5] ^ l.shift
=> 0

$ l
=> []
引数で渡されたワンタイムパスワードと、現在のワンタイムパスワードをバイナリにしてビット演算し、両者が一致(0だったら)していれば TRUE が返る処理になっていました。
なぜこのような処理になっているかはrotp内では言及されていませんでしたが、deviseに似たような処理があり、以下のブログで、
「これは、認証用の文字列 (ハッシュされたパスワードか API トークンかに関係なく) を比較するときに本当に実行したいことです。
これにより、アプリケーションでタイミング攻撃を使用することがはるかに難しくなります。」
と言及されていました。なので、Timing Attackを軽減させるための実装なのかもしれません。
寄り道が長くなってしまいました。
OTPクラスのverifyが TRUE だった場合、timecodeとintervalを乗算した値が返り値となります。
一度もvefiryが TRUE にならなかった場合は、nilが返り値となります。
まとめ
Tokenの生成やビット演算など、普段Webアプリの実装をしているとあまり見かけないコードにお目にかかることができました。
2要素認証の機能をごくごく簡単に実装できる素晴らしいGemだと思うので、機会があれば使ってみようかと思います。
メールのFromに特殊文字を入れるとBounceすることがある
こんにちは!kossyです!
さて、今回はメール送信時にFromに特殊文字を入れてBounceする事案に遭遇したので、
ブログに残してみたいと思います。
[Sample] Sampleメールです
上記のように、送信元の文字の始まりが 半角の [ の場合、メールがBounceされてしまうことがあります。
Ruby On Rails のActionMailer等でメールを送信している場合、以下のような記述になっていると、問題が発生する可能性があります。
mail from: "[Sample] <no-reply@sample.com>", subject: 'Sample'
どうしてもFromに差出人名を入れたい場合は、半角カッコではなく、「【 」の ような全角カッコを使うようにしましょう。
mail from: "【Sample】 <no-reply@sample.com>", subject: 'Sample'
ActionMailerでHeaderの中身を確認したい
こんにちは!kossyです!
今回はActionMailerで送信するメールのHeaderの中身をコンソールから確認する方法について、
ブログに残してみたいと思います。
環境
Ruby 2.6.9
Rails 6.1.4
sendgrid
deliver_now を使う
Jobでメール送信をQueueする場合はdeliver_laterを使うのが一般的だと思いますが、
deliver_nowを使うと、JobではなくWebサーバー上で同期的にメールを送信することができます。
mail = SampleMailer.send_mail.deliver_now
<Mail::Message:99301180,
  Multipart: false,
  Headers:
    <Date: Thu, 03 Feb 2022 18:01:39 +0900>,
    <From: sample <no-reply-qa@mail.sample.com>>,
    <To: ["samplestaff001@sample.co.jp", "samplestaff002@sample.co.jp"]>,
    <Bcc: ["sample.co.jp"]>,
    <Message-ID: <sample@ip-10-1-3-173.ap-northeast-1.compute.internal.mail>>,
    <Subject: 【sample】サンプルメールです。>,
    <Mime-Verscomn: 1.0>,
    <Content-Type: text/html>,
    <Content-Transfer-Encoding: quoted-printable>,
    <categories: www.sample.xyz, sample>,
    <send-at: 1643878898>,
    <custom-args: {:send_at=>1643878898, :environment=>"www.sample.xyz",:mailer=>"sample"}>
>
Headersの部分がメール送信時のHeaderになります。
ちなみにdeliver_nowの返り値は Mail::Message オブジェクトになっているので、 headerメソッドのfield_summaryというメソッドが使えます。
field_summaryメソッドを使うと、Header部分をinspectした値を得られます。
mail.header.field_summary
=> "<Date: Thu, 03 Feb 2022 18:01:39 +0900>,
    <From: Sample <no-reply-sample@mail.sample.xyz>>,
    <To: [\"sample1@sample.co.jp\", \"sample2@sample.co.jp\"]>,
    <Bcc: [\"sample3@sample.co.jp\"]>,
    <Message-ID: <sample@ip-10-1-3-173.ap-northeast-1.compute.internal.mail>>,
    <Subject: 【sample】サンプルメールです。>,
    <Mime-Version: 1.0>,
    <Content-Type: text/html>,
    <Content-Transfer-Encoding: quoted-printable>,
    <categories: www.sample.xyz, sample>,
    <send-at: 1643878898>,
    <custom-args: {:send_at=>1643878898, :environment=>\"www.sample.xyz\",
      :mailer=>\"sample\"}>"
勉強になりました。
RailsのActiveRecordを使ったモデルに定義されたassociation情報を全て取得する reflect_on_all_associations のソースコードを読んでみる
こんにちは!kossyです!
諸事情ありブログを書かずにおりました、、、
月8 ~ 10本ペースは守りたいと思いつつも、なかなか時間の確保が厳しいですね、、、(根性が足りないと言われればその通りなのですが)
今回は、RailsのActiveRecordを使ったモデルに定義されたassociation情報を全て取得する reflect_on_all_associations のソースコードを読んでみたので、
備忘録としてブログに残してみたいと思います。
reflect_on_all_associations
まずは適当な箇所にbinding.pryを仕込んで、stepメソッドで処理の内部を見てみます。
From: /usr/local/bundle/gems/activerecord-6.0.4.1/lib/active_record/reflection.rb:104 ActiveRecord::Reflection::ClassMethods#reflect_on_all_associations:

    103: def reflect_on_all_associations(macro = nil)
 => 104:   association_reflections = reflections.values
    105:   association_reflections.select! { |reflection| reflection.macro == macro } if macro
    106:   association_reflections
    107: end

[1] pry(User)>
定義元はこちらですね。
いろいろ実行する前に、コメントアウト部分を読んでみます。
Returns an array of AssociationReflection objects for all the associations in the class.
If you only want to reflect on a certain association type, pass in the symbol :has_many, :has_one, :belongs_to as the first parameter.
クラス内のすべての関連付けのAssociationReflectionオブジェクトの配列を返します。
特定の関連付けタイプのみを反映する場合は、最初のパラメーターとしてシンボル:has_many、:has_one、:belongs_toを渡します。
出典: https://github.com/rails/rails/blob/main/activerecord/lib/active_record/reflection.rb
返り値は配列になるとのこと。一旦exitで抜けて、メソッドの中に入らずに返り値を確認してみます。
$  User.reflect_on_all_associations
=> [#<ActiveRecord::Reflection::HasManyReflection:0x000055b2c512eaa8
  @active_record=
   User(id: integer, email: string, encrypted_password: string, reset_password_token: string, reset_password_sent_at: datetime, remember_created_at: datetime, unique_session_id: string, created_at: datetime, updated_at: datetime),
  @constructable=true,
  @foreign_type=nil,
  @klass=nil,
  @name=:posts,
  @options={:dependent=>:destroy},
  @plural_name="posts",
  @scope=nil,
  @type=nil>]

$ User.reflect_on_all_associations.class
=> Array

$ User.reflect_on_all_associations.size
=> 1

$ User.reflect_on_all_associations.first.class
=> ActiveRecord::Reflection::HasManyReflection
返り値は配列になっていて、ActiveRecord::Reflection::HasManyReflectionクラスのオブジェクトが配列の中身に格納されていました。
ソースコードを追ってみる
ここからはもう一度stepメソッドを使ってメソッドの中身を追ってみます。
From: /usr/local/bundle/gems/activerecord-6.0.4.1/lib/active_record/reflection.rb:104 ActiveRecord::Reflection::ClassMethods#reflect_on_all_associations:

    103: def reflect_on_all_associations(macro = nil)
 => 104:   association_reflections = reflections.values
    105:   association_reflections.select! { |reflection| reflection.macro == macro } if macro
    106:   association_reflections
    107: end

# 引数を渡して実行してないため、nilが返る
>  macro
=> nil

# hashが返り値になっている
> reflections
=> {"posts"=>
  #<ActiveRecord::Reflection::HasManyReflection:0x000055b2c512eaa8
   @active_record=
    User(id: integer, email: string, encrypted_password: string, reset_password_token: string, reset_password_sent_at: datetime, remember_created_at: datetime, unique_session_id: string, created_at: datetime, updated_at: datetime),
   @constructable=true,
   @foreign_type=nil,
   @klass=nil,
   @name=:posts,
   @options={:dependent=>:destroy},
   @plural_name="posts",
   @scope=nil,
   @type=nil>}

# posts keyの中身が配列で返っている
> reflections.values
=> [#<ActiveRecord::Reflection::HasManyReflection:0x000055b2c512eaa8
  @active_record=
   User(id: integer, email: string, encrypted_password: string, reset_password_token: string, reset_password_sent_at: datetime, remember_created_at: datetime, unique_session_id: string, created_at: datetime, updated_at: datetime),
  @constructable=true,
  @foreign_type=nil,
  @klass=nil,
  @name=:posts,
  @options={:dependent=>:destroy},
  @plural_name="posts",
  @scope=nil,
  @type=nil>]
一通り処理の内容は理解できました。reflectionsオブジェクトの中身をよしなにいじって、モデルに定義されたassociation情報を返している感じですね。
応用的な使い方
以下のように書くと、そのモデルに定義されているassociation名の配列を得ることができます。
$ User.reflect_on_all_associations.map(&:name)
=> [:posts]
例えば、has_manyなレコードが存在する場合に何かしらの処理を加えたい、という場合に以下のように書くことができます。
has_many_association_names = User.reflect_on_all_associations(:has_many).map(&:name)

if has_many_association_names.any? { |name| user.public_send(name).exists? }
  # 何かしらの処理
else
  # 何かしらの処理
end
こう書くことで、新たに関連を追加した時に、わざわざ定数にsymbolを追加しなくてもよくなり、コードの変更箇所を減らすことができます。
勉強になりました。
SmartHealthCardsの発行と検証を行うことができるGem 「health_cards」の JWSの生成周りのソースコードを読んでみる
こんにちは!kossyです!
今回はSmartHealthCardsの発行と検証を行うことができるGem 「health_cards」の JWSの生成周りのソースコードを読んでみたので、
備忘録としてブログに残してみたいと思います。
環境
Ruby 3.0.3
Rails 6.1.3.1
MacOS Catalina latest
HealthCards::Issuer#issue_jws
例によってtest_appディレクトリのファイルを基に動作を確認してみます。
$ key = HealthCards::PrivateKey.generate_key

$ issuer = HealthCards::Issuer.new(key: key, url: 'http://example.com')

$ jws = issuer.issue_jws(FHIR::Bundle.new)

From: health_cards/lib/health_cards/issuer.rb:35 HealthCards::Issuer#issue_jws:

    33: def issue_jws(bundle, type: Payload)
    34:   binding.pry
 => 35:   card = create_payload(bundle, type: type)
    36:   JWS.new(header: jws_header, payload: card.to_s, key: key)
    37: end

$ bundle
=> #<FHIR::Bundle:0x00007fb0c1cbfce0
 @entry=[],
 @id=nil,
 @identifier=nil,
 @implicitRules=nil,
 @language=nil,
 @link=[],
 @meta=nil,
 @signature=nil,
 @timestamp=nil,
 @total=nil,
 @type=nil>

$ type
=> HealthCards::Payload
一通り引数の中身を確認できたので、まずは HealthCards::Issuer#create_payload メソッドから見てみます。
HealthCards::Issuer#create_payload
# Create a Payload from the supplied FHIR bundle
#
# @param bundle [FHIR::Bundle, String] the FHIR bundle used as the Health Card payload
# @return [Payload::]
def create_payload(bundle, type: Payload)
  type.new(issuer: url, bundle: bundle)
end
コメントアウト部分を訳してみます。
引数で渡されたFHIRバンドルからペイロードを作成します。
bundle (FHIR::BundleまたはString) : HealthCardのPayloadとして使用されるFHIRバンドル
返り値は HealthCards::Payload インスタンス出典: https://github.com/dvci/health_cards/blob/main/lib/health_cards/issuer.rb
FHIR::Bundle はfhir_model というGemで定義されているクラスです。
stepメソッドでcreate_payloadメソッドの処理を追ってみます。
From: health_cards/issuer.rb:24 HealthCards::Issuer#create_payload:

    23: def create_payload(bundle, type: Payload)
 => 24:   type.new(issuer: url, bundle: bundle)
    25: end

$ type.new(issuer: url, bundle: bundle)
=> #<HealthCards::Payload:0x00007fb103fa2240
 @bundle=
  #<FHIR::Bundle:0x00007fb0c1cbfce0
   @entry=[],
   @id=nil,
   @identifier=nil,
   @implicitRules=nil,
   @language=nil,
   @link=[],
   @meta=nil,
   @signature=nil,
   @timestamp=nil,
   @total=nil,
   @type=nil>,
 @issuer="http://example.com">
コメントアウトに記載があった通り、HealthCards::Payloadクラスのインスタンスが返りました。
SmartHealthCardsの仕様に則ってPayloadを管理するクラスのようですね。
本記事内では SmartHealthCards の仕様の深掘りは避けたいと思います、、、(それだけで1本のブログになりそうなので)
次はHealthCards::JWSクラスの実装を深掘ってみます。
HealthCards::JWS
# frozen_string_literal: true

module HealthCards
  # Create JWS from a payload
  class JWS
    class << self
      include Encoding

      # Creates a JWS from a String representation, or returns the HealthCards::JWS object
      # that was passed in
      # @param jws [String, HealthCards::JWS] the JWS string, or a JWS object
      # @param public_key [HealthCards::PublicKey] the public key associated with the JWS
      # @param key [HealthCards::PrivateKey] the private key associated with the JWS
      # @return [HealthCards::JWS] A new JWS object, or the JWS object that was passed in
      def from_jws(jws, public_key: nil, key: nil)
        return jws if jws.is_a?(HealthCards::JWS) && public_key.nil? && key.nil?

        unless jws.is_a?(HealthCards::JWS) || jws.is_a?(String)
          raise ArgumentError,
                'Expected either a HealthCards::JWS or String'
        end

        header, payload, signature = jws.to_s.split('.').map { |entry| decode(entry) }
        header = JSON.parse(header)
        JWS.new(header: header, payload: payload, signature: signature,
                public_key: public_key, key: key)
      end
    end

    attr_reader :key, :public_key, :payload
    attr_writer :signature
    attr_accessor :header

    # Create a new JWS

    def initialize(header: nil, payload: nil, signature: nil, key: nil, public_key: nil)
      # Not using accessors because they reset the signature which requires both a key and a payload
      @header = header
      @payload = payload
      @signature = signature if signature
      @key = key
      @public_key = public_key || key&.public_key
    end

    # The kid value from the JWS header, used to identify the key to use to verify
    # @return [String]
    def kid
      header['kid']
    end

    # Set the private key used for signing issued health cards
    #
    # @param key [HealthCards::PrivateKey, nil] the private key used for signing issued health cards
    def key=(key)
      PrivateKey.enforce_valid_key_type!(key, allow_nil: true)

      @key = key

      # If it's a new private key then the public key and signature should be updated
      return if @key.nil?

      reset_signature
      self.public_key = @key.public_key
    end

    # Set the public key used for signing issued health cards
    #
    # @param public_key [HealthCards::PublicKey, nil] the private key used for signing issued health cards
    def public_key=(public_key)
      PublicKey.enforce_valid_key_type!(public_key, allow_nil: true)

      @public_key = public_key
    end

    # Set the JWS payload. Setting a new payload will result in the a new signature
    # @param new_payload [Object]
    def payload=(new_payload)
      @payload = new_payload
      reset_signature
    end

    # The signature component of the card
    #
    # @return [String] the unencoded signature
    def signature
      return @signature if @signature

      raise MissingPrivateKeyError unless key

      @signature ||= key.sign(jws_signing_input)
    end

    # Export the card to a JWS String
    # @return [String] the JWS
    def to_s
      [JSON.generate(header), payload, signature].map { |entry| JWS.encode(entry) }.join('.')
    end

    # Verify the digital signature on the jws
    #
    # @return [Boolean]
    def verify
      raise MissingPublicKeyError unless public_key

      public_key.verify(jws_signing_input, signature)
    end

    private

    def jws_signing_input
      "#{JWS.encode(@header.to_json)}.#{encoded_payload}"
    end

    def encoded_payload
      JWS.encode(payload)
    end

    # Resets the signature
    #
    # This method is primarily used when an attribute that affects
    # the signature is changed (e.g. the private key changes, the payload changes)
    def reset_signature
      @signature = nil
      signature if key && payload
    end
  end
end
まずは initializeメソッドから見てみます。
HealthCards::JWS#initialize
# Create a new JWS
# 新しいJWSを作成します。

def initialize(header: nil, payload: nil, signature: nil, key: nil, public_key: nil)
  # Not using accessors because they reset the signature which requires both a key and a payload
  @header = header
  @payload = payload
  @signature = signature if signature
  @key = key
  @public_key = public_key || key&.public_key
end
stepメソッドで処理を追ってみます。
From: health_cards/lib/health_cards/issuer.rb:36 HealthCards::Issuer#issue_jws:

    33: def issue_jws(bundle, type: Payload)
    34:   binding.pry
    35:   card = create_payload(bundle, type: type)
 => 36:   JWS.new(header: jws_header, payload: card.to_s, key: key)
    37: end

$ step

From: health_cards/lib/health_cards/issuer.rb:63 HealthCards::Issuer#jws_header:

    62: def jws_header
 => 63:   { 'zip' => 'DEF', 'alg' => 'ES256', 'kid' => key.public_key.kid }
    64: end

$ key.public_key.kid
=> "v_HwwS_bad-bOABD3Uf9DpmMNMpKD_OxKtYluML1Mxs"
zipやalg、kidとはなんぞや?についてはrfc7516に記載があります。
alg
4.1.1. "alg" (Algorithm) Header Parameter
This parameter has the same meaning, syntax, and processing rules as the "alg" Header Parameter defined in Section 4.1.1 of [JWS], except that the Header Parameter identifies the cryptographic algorithm used to encrypt or determine the value of the CEK.
The encrypted content is not usable if the "alg" value does not represent a supported algorithm, or if the recipient does not have a key that can be used with that algorithm.A list of defined "alg" values for this use can be found in the IANA "JSON Web Signature and Encryption Algorithms" registry established by [JWA]; the initial contents of this registry are the values defined in Section 4.1 of [JWA].
このパラメーターは、[JWS]のセクション4.1.1で定義されている「alg」ヘッダーパラメーターと同じ意味、構文、および処理ルールを持ちます。
ただし、ヘッダーパラメーターは、CEKの値を暗号化または決定するために使用される暗号化アルゴリズムを識別します。「alg」値がサポートされているアルゴリズムを表していない場合、または受信者がそのアルゴリズムで使用できるキーを持っていない場合、暗号化されたコンテンツは使用できません。
この使用のために定義された「alg」値のリストは、[JWA]によって確立されたIANA「JSONWeb署名および暗号化アルゴリズム」レジストリにあります。
このレジストリの初期の内容は、[JWA]のセクション4.1で定義されている値です。
RFC7518によると、ES256 アルゴリズムが recommended として記載されていました。
そのため、health_cards GemでもデフォルトのalgパラメータにES256を指定しているものと思われます。
zip
The "zip" (compression algorithm) applied to the plaintext before encryption, if any. The "zip" value defined by this specification
is:
o "DEF" - Compression with the DEFLATE [RFC1951] algorithm
Other values MAY be used. Compression algorithm values can be registered in the IANA "JSON Web Encryption Compression Algorithms" registry established by [JWA].
The "zip" value is a case-sensitive string.
If no "zip" parameter is present, no compression is applied to the plaintext before encryption.
When used, this Header Parameter MUST be integrity protected; therefore, it MUST occur only within the JWE Protected Header.
Use of this Header Parameter is OPTIONAL. This Header Parameter MUST be understood and processed by implementations.暗号化する前にプレーンテキストに適用される「zip」(圧縮アルゴリズム)。この仕様で定義されている「zip」値は次のとおりです。
o "DEF"-DEFLATE [RFC1951]アルゴリズムによる圧縮
他の値が使用される場合があります。圧縮アルゴリズムの値は、[JWA]によって確立されたIANA "JSON Web Encryption Compression Algorithms"レジストリに登録できます。
「zip」値は、大文字と小文字が区別される文字列です。 「zip」パラメータが存在しない場合、暗号化の前にプレーンテキストに圧縮は適用されません。
使用する場合、このヘッダーパラメーターは整合性を保護する必要があります。したがって、JWE保護ヘッダー内でのみ発生する必要があります。
このヘッダーパラメータの使用はオプションです。このヘッダーパラメータは、実装によって理解および処理される必要があります。
平たく言うと、コンテンツを暗号化する前に、zip headerで指定されているアルゴリズム(今回はDEFLATE)でプレーンテキストを圧縮できるということかと思われます。
kid
This parameter has the same meaning, syntax, and processing rules as the "kid" Header Parameter defined in Section 4.1.4 of [JWS],
except that the key hint references the public key to which the JWE was encrypted;
this can be used to determine the private key needed to decrypt the JWE.
This parameter allows originators to explicitly signal a change of key to JWE recipients.
このパラメーターは、[JWS]のセクション4.1.4で定義されている「kid」ヘッダーパラメーターと同じ意味、構文、および処理ルールを持ちます。
ただし、キーヒントはJWEが暗号化された公開キーを参照します。 これは、JWEを復号化するために必要な秘密鍵を決定するために使用できます。
このパラメーターを使用すると、発信者はキーの変更をJWE受信者に明示的に通知できます。
RFC7515の4.1.4を見てみます。
The "kid" (key ID) Header Parameter is a hint indicating which key was used to secure the JWS.
This parameter allows originators to explicitly signal a change of key to recipients.
The structure of the "kid" value is unspecified.
Its value MUST be a case-sensitive string. Use of this Header Parameter is OPTIONAL.When used with a JWK, the "kid" value is used to match a JWK "kid" parameter value.
「kid」(キーID)ヘッダーパラメータは、JWSを保護するために使用されたキーを示すヒントです。
このパラメーターを使用すると、発信者は受信者にキーの変更を明示的に通知できます。
「kid」値の構造は指定されていません。
その値は大文字と小文字を区別する文字列でなければなりません。 このヘッダーパラメータの使用はオプションです。JWKとともに使用する場合、「kid」値はJWK「kid」パラメーター値と一致するために使用されます。
「kid」値の構造は指定されていません。が、「その値は大文字と小文字を区別する文字列でなければなりません。」とのこと。
「発信者は受信者にキーの変更を明示的に通知できます。」も抑えておけば一旦はよさそうです。
寄り道がだいぶ長くなりました。実際に JWS.new で生成される値は以下の通りです。
$ jws = JWS.new(header: jws_header, payload: card.to_s, key: key)
=> #<HealthCards::JWS:0x00007fb0c0058200
 @header={"zip"=>"DEF", "alg"=>"ES256", "kid"=>"Nx1LIgqlyubgocWo7EgptlZ4Cg0iuOuUPw1a5U7ATk8"},
 @key=
  #<HealthCards::PrivateKey:0x00007fb0e3f71ef8
   @key=#<OpenSSL::PKey::EC:0x00007fb0e3f71f20>,
   @public_key=
    #<HealthCards::PublicKey:0x00007fb10760b700
     @coordinates=
      {:x=>"5cIFHiDkh35xAmGnAj5cxIBk99KQWvwo9r6cqpon6Kk",
       :y=>"wyc5x3azGxi0CaFt8yVUJHdaXblJhjh7hTnL2WqI9ek",
       :kty=>"EC",
       :crv=>"P-256"},
     @key=#<OpenSSL::PKey::EC:0x00007fb0a54a4568>>>,
 @payload="",
 @public_key=
  #<HealthCards::PublicKey:0x00007fb10760b700
   @coordinates=
    {:x=>"5cIFHiDkh35xAmGnAj5cxIBk99KQWvwo9r6cqpon6Kk", :y=>"wyc5x3azGxi0CaFt8yVUJHdaXblJhjh7hTnL2WqI9ek", :kty=>"EC", :crv=>"P-256"},
   @key=#<OpenSSL::PKey::EC:0x00007fb0a54a4568>>>
SmartHealthCardsの発行と検証を行うことができるGem 「health_cards」の 公開鍵検証周りのソースコードを読んでみる
こんにちは!kossyです!
今回は SmartHealthCardsの発行と検証を行うことができるGem 「health_cards」の、
公開鍵の検証周りのソースコードを読んでみたいと思います。
環境
Ruby 3.0.3
Rails 6.1.3.1
MacOS Catalina latest
HealthCards::Verifier
APIドキュメントが用意されていたので確認してみます。
Verify health cards based on a stored public key Verifiers may contain one or more public keys (using KeySet)
保存された公開鍵に基づいてヘルスカードを検証します。Verifiersには、1つ以上の公開鍵を含めることができます(KeySetを使用)
出典: https://github.com/dvci/health_cards/blob/main/lib/API.md#healthcardsverifier
ドキュメントからわかる仕様についての情報はほとんどないですね、、、
HealthCards::Verifierクラスの検証処理を動かしながら追ってみましょう。
HealthCards::Verifier#verify
test_appが用意されていたので、HealthCards::Verifier.verifyにbinding.pryを記述してコンソールで試してみます。
$ key = HealthCards::PrivateKey.generate_key

$ issuer = HealthCards::Issuer.new(key: key, url: 'http://example.com')

$ jws = issuer.issue_jws(FHIR::Bundle.new)

$ ver = HealthCards::Verifier.new(keys: key.public_key)

$ ver.verify(jws)

From: health_cards/lib/health_cards/verifier.rb:62 HealthCards::Verifier#verify:

    60: def verify(verifiable)
    61:   binding.pry
 => 62:   verify_using_key_set(verifiable, keys, resolve_keys: resolve_keys?)
    63: end
verify_using_key_setメソッドを見てみる必要がありそう。
HealthCards::Verification.verify_using_key_set
# Verify Health Card with given KeySet
#
# @param verifiable [HealthCards::JWS, String] the health card to verify
# @param key_set [HealthCards::KeySet, nil] the KeySet from which keys should be taken or added
# @param resolve_keys [Boolean] if keys should be resolved
# @return [Boolean]
def verify_using_key_set(verifiable, key_set = nil, resolve_keys: true)
  jws = verifiable.is_a?(HealthCards::HealthCard) ? verifiable.jws : JWS.from_jws(verifiable)
  key_set ||= HealthCards::KeySet.new
  key_set.add_keys(resolve_key(jws)) if resolve_keys && key_set.find_key(jws.kid).nil?

  key = key_set.find_key(jws.kid)
  unless key
    raise MissingPublicKeyError,
          'Verifier does not contain public key that is able to verify this signature'
  end

  jws.public_key = key
  jws.verify
end
まずはコメントアウト部分を読んでみます。
# Verify Health Card with given KeySet
#
# @param verifiable [HealthCards::JWS, String] the health card to verify
# @param key_set [HealthCards::KeySet, nil] the KeySet from which keys should be taken or added
# @param resolve_keys [Boolean] if keys should be resolved
# @return [Boolean]

指定されたKeySetでヘルスカードを確認します。

verifiable (HealthCards::JWS または String) : 確認するヘルスカード
key_set(HealthCards::KeySet または nil) : キーを取得または追加する必要があるKeySet
resolve_keys(Boolean) : キーを解決する必要がある場合は true
返り値はBoolean
一通り概要は掴めました。具体的な処理も見ていきます。
verifiable.jws
# 引数のverifiableが HealthCards::HealthCardクラスのインスタンスの時はそのインスタンスが持つjwsを返却して、
# そうでない場合はJWSのfrom_jwsメソッドでjwsを返却

$ jws = verifiable.is_a?(HealthCards::HealthCard) ? verifiable.jws : JWS.from_jws(verifiable)
=> #<HealthCards::JWS:0x00007fcb5c8a26e8
 @header={"zip"=>"DEF", "alg"=>"ES256", "kid"=>"kp4-CyUBQV4x5nBpAzITzdkJJPVrRekiiHs2JrMqpPw"},
 @key=
  #<HealthCards::PrivateKey:0x00007fcb7f389710
   @key=#<OpenSSL::PKey::EC:0x00007fcb7f389760>,
   @public_key=
    #<HealthCards::PublicKey:0x00007fcb5e6bb210
     @coordinates=
      {:x=>"BePU7QxXPU9lSSKJ7w_7uYg-67qAic347XKfNUhs_lQ",
       :y=>"6QVRjH1arEJcFYsBw1wd_CbvpW-iT5HV7LcSzsH3v_0",
       :kty=>"EC",
       :crv=>"P-256"},
     @key=#<OpenSSL::PKey::EC:0x00007fcb5e6bb288>>>,
 @payload=
  "-\x8DM\x0E\x820\x10\x85\xEF2n\xB1@D\xA2]z\x05\x8D\e\xE3\xA2\x94!\xADi\v\x99\x0EFC\xBC\xBB-:\xBB7\xEF\xE7[\xC0\xC6\b\x12\f\xF3$\xCB\x12_\xCAO\x0E\x85\x1E=\x14\x10\xBA\x01d\xDD6uu\xDC\x1D\xF6m\x01O\rr\x01~O\b\xF2\xB6vb*E\xAF\x88\r*\xC7FhE}\xDC\xFC\xC46\v\xB8\x17\xA0\t{\fl\x95;\xCF\xDD\x035\xE7\x95\xC1X\xBA\"E;\x86\xC4oD%\xEA\x84\xCC\xDF\xD3\x1Cz\x879C\x18\xC7\x994^V\"\xFC\x8DO\xBA/",
 @public_key=
  #<HealthCards::PublicKey:0x00007fcb5e6bb210
   @coordinates=
    {:x=>"BePU7QxXPU9lSSKJ7w_7uYg-67qAic347XKfNUhs_lQ",
     :y=>"6QVRjH1arEJcFYsBw1wd_CbvpW-iT5HV7LcSzsH3v_0",
     :kty=>"EC",
     :crv=>"P-256"},
   @key=#<OpenSSL::PKey::EC:0x00007fcb5e6bb288>>>
HealthCardクラスの処理を見たところ、initializeメソッドでjwsが定義されているようでした。
# frozen_string_literal: true

module HealthCards
  # Represents a signed SMART Health Card
  class HealthCard
    extend Forwardable

    attr_reader :jws

    def_delegator :@qr_codes, :code_by_ordinal
    def_delegators :@payload, :bundle, :issuer

    # Create a HealthCard from a JWS
    # @param jws [JWS, String] A JWS object or JWS string
    def initialize(jws)
      @jws = JWS.from_jws(jws)
      @payload = Payload.from_payload(@jws.payload)
      @qr_codes = QRCodes.from_jws(@jws)
    end

  # 省略
end
次に key_set.find_key の処理を見てみます。
HealthCards::KeySet#find_key
# Retrieves a key from the keyset with a kid
# that matches the parameter
# @param kid [String] a Base64 encoded kid from a JWS or Key
# @return [Payload::Key] a key with a matching kid or nil if not found

# パラメータに一致する子を持つキーセットからキーを取得します。
# kid(String) : JWSまたはキーからのBase64でエンコードされたkid
# 返り値は Payload :: Key (一致する子を持つキー、または見つからない場合はnil)

def find_key(kid)
  @key_map[kid]
end
KeySetインスタンス生成時に定義される@key_map変数の中の値を引数のkidで走査して、該当するkidを持つ値があればそれを返却するメソッドでした。
取得したkeyをjwsのpublic_keyとして代入し、その後 HealthCards::JWS#verifyを呼び出しているようなのでコードを読んでみます。
HealthCards::JWS#verify
def verify
  raise MissingPublicKeyError unless public_key

  public_key.verify(jws_signing_input, signature)
end
public_key属性が nil または falseの場合は例外をraiseさせていました。
検証する処理はHealthCard::PublicKeyのインスタンスが担っているっぽいですね。
その前にpublic_key.verifyに渡している引数の中身を見てみましょう。
From: health_cards/lib/health_cards/jws.rb:105 HealthCards::JWS#verify:

    102: def verify
    103:   raise MissingPublicKeyError unless public_key
    104:
 => 105:   public_key.verify(jws_signing_input, signature)
    106: end

$ jws_signing_input
=> "eyJ6aXAiOiJERUYiLCJhbGciOiJFUzI1NiIsImtpZCI6ImtwNC1DeVVCUVY0eDVuQnBBeklUemRrSkpQVnJSZWtpaUhzMkpyTXFwUHcifQ.LY1NDoIwEIXvMm6xQESiXXoFjRvjopQhrWkLmQ5GQ7y7LTq7N-_nW8DGCBIM8yTLEl_KTw6FHj0UELoBZN02dXXcHfZtAU8NcgF-TwjytnZiKkWviA0qx0ZoRX3c_MQ2C7gXoAl7DGyVO8_dAzXnlcFYuiJFO4bEb0Ql6oTM39Mceoc5QxjHmTReViL8jU-6Lw"

$ signature
=>"\x11\xB7C\xF3!z\x18\xA0\xDC\x1F\xFE\xB7\x9A\xCD\xDCo[\xCAM\xAF:\xE8\x15\xFE\x00\x10\f8\xF0\xB5H\x87\xD8\x7FU\x92\xE5\xC3\x06\xC7\xE6|\x84\xB3\xBB{\xDB>\x8F\xDF]\xA2\xAE?\x88\xB4]\xD9\x8AC\xD1t_\x0F"

$ method(:jws_signing_input).source_location
=> ["health_cards/lib/health_cards/jws.rb", 110]
jws_signing_inputのコードはこちら。
def jws_signing_input
  "#{JWS.encode(@header.to_json)}.#{encoded_payload}"
end
stepメソッドで処理を追います。
From: health_cards/lib/health_cards/jws.rb:111 HealthCards::JWS#jws_signing_input:

    110: def jws_signing_input
 => 111:   "#{JWS.encode(@header.to_json)}.#{encoded_payload}"
    112: end

$ @header.to_json
=> "{\"zip\":\"DEF\",\"alg\":\"ES256\",\"kid\":\"kp4-CyUBQV4x5nBpAzITzdkJJPVrRekiiHs2JrMqpPw\"}"

$ JWS.encode(@header.to_json)
=> "eyJ6aXAiOiJERUYiLCJhbGciOiJFUzI1NiIsImtpZCI6ImtwNC1DeVVCUVY0eDVuQnBBeklUemRrSkpQVnJSZWtpaUhzMkpyTXFwUHcifQ"
HealthCard::JWS.encodeのコードはこちら。
require 'base64'

module HealthCards
  # Encoding utilities for producing JWS
  #
  # @see https://datatracker.ietf.org/doc/html/rfc7515#appendix-A.3.1
  module Encoding
    # Encodes the provided data using url safe base64 without padding
    # @param data [String] the data to be encoded
    # @return [String] the encoded data
    def encode(data)
      Base64.urlsafe_encode64(data, padding: false).gsub("\n", '')
    end

    # Decodes the provided data using url safe base 64
    # @param data [String] the data to be decoded
    # @return [String] the decoded data
    def decode(data)
      Base64.urlsafe_decode64(data)
    end
  end
end
Base64モジュールのurlsafe_encode64を padiing: false で呼び出して、改行文字を消したdataを返すメソッドになっていました。
padding: falseにして呼び出すと、==を消した上でencodeしてくれるようです。
encoded_payloadメソッドも内部でJWS.encodeメソッドを呼んでいました。
さて、ようやく HealthCard::PublicKey#verifyメソッドにたどり着きました、、、
HealthCard::PublicKey#verify
def verify(payload, signature)
  @key.verify(OpenSSL::Digest.new('SHA256'), raw_to_asn1(signature, self), payload)
end
コンソールで試します。
From: health_cards/lib/health_cards/public_key.rb:11 HealthCards::PublicKey#verify:

    10: def verify(payload, signature)
 => 11:   @key.verify(OpenSSL::Digest.new('SHA256'), raw_to_asn1(signature, self), payload)
    12: end

$ @key
=> #<OpenSSL::PKey::EC:0x00007fcb5e6bb288>

$ payload
=> "eyJ6aXAiOiJERUYiLCJhbGciOiJFUzI1NiIsImtpZCI6ImtwNC1DeVVCUVY0eDVuQnBBeklUemRrSkpQVnJSZWtpaUhzMkpyTXFwUHcifQ.LY1NDoIwEIXvMm6xQESiXXoFjRvjopQhrWkLmQ5GQ7y7LTq7N-_nW8DGCBIM8yTLEl_KTw6FHj0UELoBZN02dXXcHfZtAU8NcgF-TwjytnZiKkWviA0qx0ZoRX3c_MQ2C7gXoAl7DGyVO8_dAzXnlcFYuiJFO4bEb0Ql6oTM39Mceoc5QxjHmTReViL8jU-6Lw"

$ signature
=> "\x11\xB7C\xF3!z\x18\xA0\xDC\x1F\xFE\xB7\x9A\xCD\xDCo[\xCAM\xAF:\xE8\x15\xFE\x00\x10\f8\xF0\xB5H\x87\xD8\x7FU\x92\xE5\xC3\x06\xC7\xE6|\x84\xB3\xBB{\xDB>\x8F\xDF]\xA2\xAE?\x88\xB4]\xD9\x8AC\xD1t_\x0F"

$  OpenSSL::Digest.new('SHA256')
=> #<OpenSSL::Digest: e3b0c44298fc1c149afbf4c8996fb92427ae41e4649b934ca495991b7852b855>

$ raw_to_asn1(signature, self)
=> "0E\x02 \x11\xB7C\xF3!z\x18\xA0\xDC\x1F\xFE\xB7\x9A\xCD\xDCo[\xCAM\xAF:\xE8\x15\xFE\x00\x10\f8\xF0\xB5H\x87\x02!\x00\xD8\x7FU\x92\xE5\xC3\x06\xC7\xE6|\x84\xB3\xBB{\xDB>\x8F\xDF]\xA2\xAE?\x88\xB4]\xD9\x8AC\xD1t_\x0F"

$ method(:raw_to_asn1).source_location
=> ["health_cards/lib/health_cards/public_key.rb", 22]
raw_to_asn1メソッドを読んでみますか。
HealthCards::PublicKey.raw_to_asn1
# Convert the raw signature into the ASN.1 Representation
#
# Adapted from ruby-jwt and json-jwt gems. More info here:
# https://github.com/nov/json-jwt/issues/21
# https://github.com/jwt/ruby-jwt/pull/87
# https://github.com/jwt/ruby-jwt/issues/84
def raw_to_asn1(signature, key)
  byte_size = (key.group.degree + 7) / 8
  sig_bytes = signature[0..(byte_size - 1)]
  sig_char = signature[byte_size..] || ''
  OpenSSL::ASN1::Sequence.new([sig_bytes, sig_char].map do |int|
    OpenSSL::ASN1::Integer.new(OpenSSL::BN.new(int, 2))
  end).to_der
end
ANS1がよくわからなかったので簡単に調べてみました。
ASN.1 【Abstract Syntax Notation One】
ASN.1とは、データ構造の表現形式を定義するための標準的な記法の一つ。主に通信プロトコル(通信規約)で扱われるデータの送受信単位(PDU:Protocol Data Unit)の定義に用いられる。
概要は掴めました。(この記事内での深掘りは避けます、、、)
次に、More info のリンク先を確認してみます。
全てアクセスして確認したところ、重要そうなのは以下のリンクでした。
以下、引用と翻訳の大意です。
ruby-jwt fails with a Signature verification failed (JWT::VerificationError) error when decoding a valid JWT signed with ES512.
I believe this is due to an issue with improper ECDSA signature serialization format where the signature parameters are not concatenated in the proper order.
The improper serialization results in an implementation being able to successfully verify its own JWTs but not those generated by other conforming libraries.We encountered the same issue and fixed it on PyJWT a little while ago but some users are now reporting issues with ruby-jwt validating ECDSA-signed tokens and I wanted to pass along the information.
PyJWT now has tests validating it against RFC 7520 test vectors to ensure all algorithms serialize properly. It may be a good idea to do a similar thing here.ES512署名アルゴリズムで署名された有効なJWTをデコードすると、ruby-jwtがエラーで失敗します。Signature verification failed (JWT::VerificationError)
これは、署名パラメータが適切な順序で連結されていない、不適切なECDSA署名シリアル化形式の問題が原因であると考えられます。
不適切なシリアル化により、実装は自身のJWTを正常に検証できますが、他の準拠ライブラリによって生成されたJWTは検証できません。
このissueの指摘事項を修正したPRが以下でした。
修正内容を見ると、ASN.1 DERフォーマットを考慮した実装に修正したようです。
なぜASN.1 DERフォーマットを考慮する必要があるのでしょうか。
参考になりそうな記事を見つけたので引用します。
SHA-256 with ECDSAによる電子署名は、各32オクテットのRとSの値で表現されます。
JWTのシグネチャに格納する際は、RFC 7518に記載されているように、RとSを単純に連結して64オクテットのバイナリデータとしてシグネチャを生成し、これをURLセーフBase64にエンコードします。
WebCrypto APIでcrypto.subtle.sign()を実行してSHA-256 with ECDSAによって署名する場合は、このRとSの単純連結した64オクテットのUint8Arrayを実行結果として取得できます。
よって、これをURLセーフBase64にエンコードして、ペイロードと.を挟んで連結することで、JWTを生成することができます。一方、Java 8等では、ECDSAによる電子署名はASN.1 DERフォーマットで扱われるため、JWTの作成や検証の際はRとSの単純連結との相互変換を行う必要があります。
なお、WebCrypto APIでは、このASN.1 DERフォーマットには対応していません。出典: https://qiita.com/tomoyukilabs/items/b346a71a920eb7a93501
なるほど、ASN.1DERフォーマットを扱うパターンもあるために考慮の必要があったようです。
かなり寄り道しましたが、最後に OpenSSL::PKey::PKey#verify を見てみましょう。
OpenSSL::PKey::PKey#verify
公式ドキュメントがありました。
verify(digest, sign, data) -> bool
data を秘密鍵で署名したその署名文字列が sign であることを公開鍵を使って検証し、検証に成功すれば true を返します。digest は利用するハッシュ関数の名前を "sha256" や "md5" といった文字列で指定します。
DSA で検証をする場合はハッシュ関数には "dss1" を指定してください。
検証に失敗した、つまり署名時と異なるハッシュ関数を使った、 sign が正しい署名でなかった場合などは false を返します。
[PARAM] digest:
利用するハッシュ関数の名前
[PARAM] sign:
検証に利用する署名文字列
[PARAM] data:
検証対象の文字列
[EXCEPTION] OpenSSL::PKey::PKeyError:
検証時にエラーが起きた場合に発生します。正しい署名でなかった場合など、検証に失敗した場合はこの例外は発生しないことに注意してください出典: https://docs.ruby-lang.org/ja/latest/method/OpenSSL=3a=3aPKey=3a=3aPKey/i/verify.html
こちらもコンソールで確認してみましょう。
From: health_cards/lib/health_cards/public_key.rb:11 HealthCards::PublicKey#verify:

    10: def verify(payload, signature)
 => 11:   @key.verify(OpenSSL::Digest.new('SHA256'), raw_to_asn1(signature, self), payload)
    12: end

$ @key.verify(OpenSSL::Digest.new('SHA256'), raw_to_asn1(signature, self), payload)
=> true

# digestにSHA512を指定
# 署名時と異なるハッシュ関数を使ったため false が返っている
$ @key.verify(OpenSSL::Digest.new('SHA512'), raw_to_asn1(signature, self), payload)
=> false

# signatureを改変してみる
$ _signature = _signature.gsub("\x11", "\x12")

# 正しい署名ではないため false が返っている
$ @key.verify(OpenSSL::Digest.new('SHA256'), raw_to_asn1(_signature, self), payload)
=> false

# payloadを改変してみる
$ _payload = payload.gsub("e", "f")

# JWSの検証に失敗したため false が返っている
$ @key.verify(OpenSSL::Digest.new('SHA256'), raw_to_asn1(signature, self), _payload)
=> false
署名時と異なるハッシュ関数を使ったり、signatureが間違っていた場合は検証に失敗することが確認できました。
まとめ
JWSを使ったverificationの仕組みをRubyで実現する良い参考実装になるのではないかと思いました。
RFC 7515 - JSON Web Signature (JWS) 日本語訳 を読んで仕様を一通り頭に入れた上でコードリーディングをすると、
より理解が深まると思います。
Railsのcofig_forメソッドでアプリケーションのカスタム値を設定してみる
こんにちは!kossyです!
今回はcofig_forメソッドでカスタム値を設定する方法について、ブログに残してみたいと思います。
使い方
# config/environments/development.rb

Rails.application.configure do
  config.custom_value = config_for(:custom_value)
end
上記のように設定を行なった場合、config/custom_value.yml を見に行って、その定義値を Rails.application.config.custom_value で参照することができます。
# config/custom_value.yml

default: &default
  status: custom

development:
  <<: *default
test:
  <<: *default
production:
  <<: *default
ではコンソールで試してみます。
# In Console

$ Rails.application.config.custom_value.status
=> "custom"
問題なくymlの値を呼び出すことができました。
OSSでの使われ方を見てみる
Railsを用いているOSSではどのように使われている見てみました。
# frozen_string_literal: true

require 'health_cards'

Rails.application.configure do
  config.smart = config_for('well-known')
  config.metadata = config_for('metadata')
  config.operation = config_for('operation')

  config.hc_key_path = ENV['KEY_PATH']
  FileUtils.mkdir_p(File.dirname(ENV['KEY_PATH']))
  kp = HealthCards::PrivateKey.load_from_or_create_from_file(config.hc_key_path)

  config.hc_key = kp
  config.issuer = HealthCards::Issuer.new(url: ENV['HOST'], key: config.hc_key)

  config.auth_code = ENV['AUTH_CODE']
  config.client_id = ENV['CLIENT_ID']
end
どうやらシンボルでも文字列でもconfig/配下のymlファイルを探しに行くようですね。
上記のアプリケーションでは、APIのエンドポイントや外部ライブラリのバージョンや返り値のフォーマット?をymlファイルに切り出して管理しているようでした。
config_for メソッドのソースコードを見てみる
まずはソースコードの定義位置を確認してみます。
# In Console

$ Rails.application.method(:config_for).source_location
=> [".../lib/rails/application.rb", 218]
こちらでした。
def config_for(name, env: Rails.env)
  yaml = name.is_a?(Pathname) ? name : Pathname.new("#{paths["config"].existent.first}/#{name}.yml")

  if yaml.exist?
    require "erb"
    all_configs    = ActiveSupport::ConfigurationFile.parse(yaml).deep_symbolize_keys
    config, shared = all_configs[env.to_sym], all_configs[:shared]

    if shared
      config = {} if config.nil? && shared.is_a?(Hash)
      if config.is_a?(Hash) && shared.is_a?(Hash)
        config = shared.deep_merge(config)
      elsif config.nil?
        config = shared
      end
    end

    if config.is_a?(Hash)
      config = ActiveSupport::OrderedOptions.new.update(config)
    end

    config
  else
    raise "Could not load configuration. No such file - #{yaml}"
  end
end
一行ずつ見てみましょう。
yaml = name.is_a?(Pathname) ? name : Pathname.new("#{paths["config"].existent.first}/#{name}.yml")
引数のnameがPathnameクラスのインスタンスであれば、nameをそのまま返し、
なければnameと同名のymlファイルをconfigディレクトリ配下から見つけてPathnameインスタンスにして返却するようになっていました。
なので、symbol or string or Pathname でもymlファイルを見つけられるみたいですね。
# 以下3つはどの書き方でもymlファイルを読み込むことができる

config_for('custom_value')
config_for(:custom_value)
config_for(Pathname.new('config/custom_value.yml'))
もしymlファイルが見つからなければ例外が上がりますね。
if yaml.exist?
  # 省略
else
  raise "Could not load configuration. No such file - #{yaml}"
end

$ Rails.application.config_for(Pathname.new('config/custom_value.yml'))
=> RuntimeError (Could not load configuration. No such file - config/custom_value.yml)
ymlファイルが存在する場合のコードを読んでみます。
require "erb"
all_configs    = ActiveSupport::ConfigurationFile.parse(yaml).deep_symbolize_keys
config, shared = all_configs[env.to_sym], all_configs[:shared]
こちらはコンソールで試してみますか。
$ all_configs = ActiveSupport::ConfigurationFile.parse(yaml).deep_symbolize_keys
=> {:default=>
  {:status=>"custom_value"},
 :development=>
  {:status=>"custom_value"},
 :test=>
  {:status=>"custom_value"},
 :production=>
  {:status=>"custom_value"},
}

$ config, shared = all_configs[env.to_sym], all_configs[:shared]
=> [{:status=>"custom_value"}, nil]
ymlで定義した値をシンボル化して、Rails.envと合致するシンボルを持つ値をconfigとして変数に格納し、
sharedというシンボルの値があればそちらも変数にしていました。(私の環境ではsharedは設定していないので nil が返っています)
もしsharedが存在していれば、という処理も記載されていましたが、今回のコードリーディングのスコープからは除外します。
次は ActiveSupport::OrderedOptions 周りを読んでみます。
if config.is_a?(Hash)
  config = ActiveSupport::OrderedOptions.new.update(config)
end
ドキュメントを見てみます。
OrderedOptions inherits from Hash and provides dynamic accessor methods.
With a Hash, key-value pairs are typically managed like this:
h = {}
h[:boy] = 'John'
h[:girl] = 'Mary'
h[:boy]  # => 'John'
h[:girl] # => 'Mary'
h[:dog]  # => nil
Using OrderedOptions, the above code can be written as:
h = ActiveSupport::OrderedOptions.new
h.boy = 'John'
h.girl = 'Mary'
h.boy  # => 'John'
h.girl # => 'Mary'
h.dog  # => nil
出典: https://api.rubyonrails.org/classes/ActiveSupport/OrderedOptions.html
使い方は理解できました。便利ですね。
updateメソッドはどうやら定義されていないようなので、method_missingメソッドで捕捉されているものと思われます。
config = ActiveSupport::OrderedOptions.new.update(config)
の実行結果は以下です。
$ config = ActiveSupport::OrderedOptions.new.update(config)
=> { :status=>"custom_value"}
結局config_forメソッドの返り値は configが返っていました。
まとめ
settingslogicやfigaro等でアプリケーションの設定値を管理するのがメジャーかと思っていたんですが、config_forでも全然良さそうですね。
Smart Health Cardの発行と検証を行えるGem 「health_cards」をRails開発環境で動かす
こんにちは!kossyです!
今回はSmart Health Cardの発行と検証を行えるGem 「health_cards」をRails開発環境で動かす手順について、ブログに残してみたいと思います。
環境
Ruby 2.7.4
Rails 6.1.3.1
MacOS Catalina
環境構築
以下のページからソースコードをcloneします。
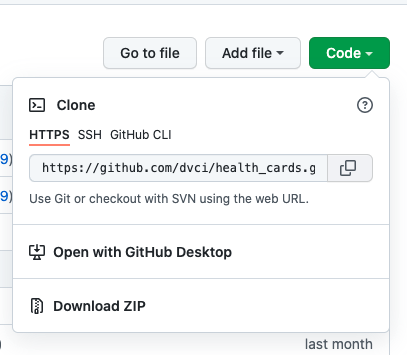
$ git clone https://github.com/dvci/health_cards.git

$ cd health_cards
次に、Ruby 2.7.4 がローカル環境にない場合は install してください。(私はrbenvを使いました)
$ rbenv install 2.7.4
次に、bin/setup コマンドを叩きます。
$ bin/setup
これで、bundle install から データベースのセットアップ(create/migrate)まで行ってくれます。
あとは bundle exec rails db:seed を実行して seed データを流すだけです。
$ bundle exec rails db:seed
動作確認
ローカルサーバーを立ち上げます。
$ bundle exec rails s -b 0.0.0.0
http://localhost:3000 にアクセスすると、以下のページが表示されると思います。
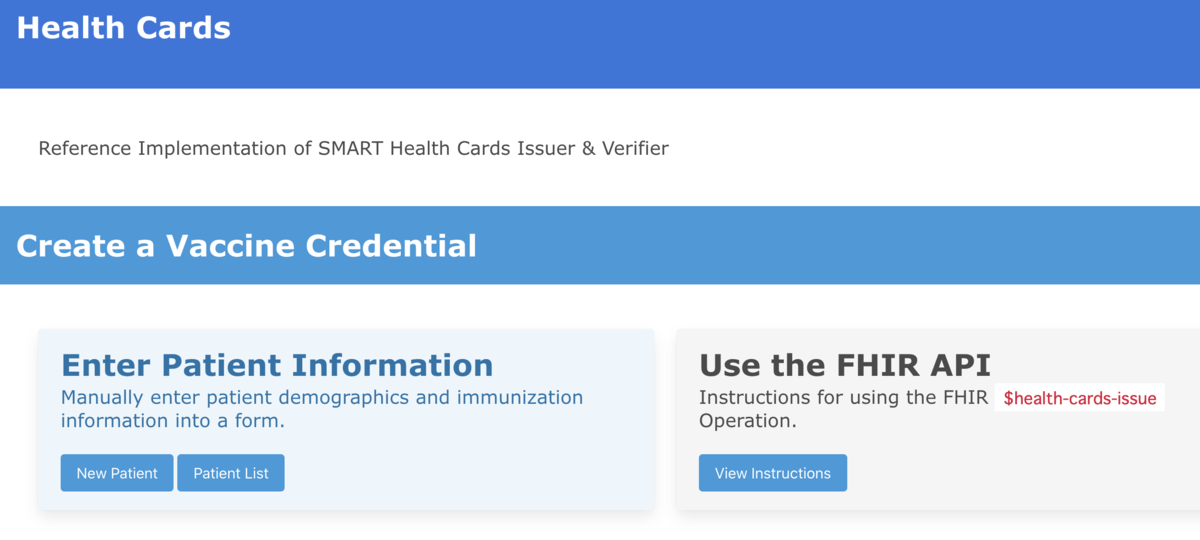
開発環境で動かすことができました。